
Published On: 22 August 2026
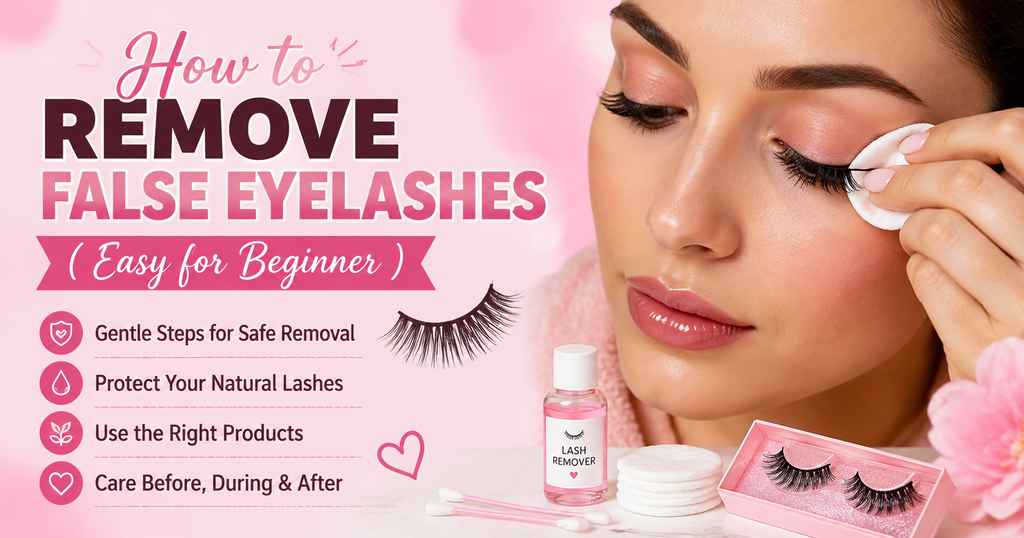
Removing false eyelashes should feel controlled, not rushed. The key is knowing when to pause, soften the adhesive, and protect the delicate eye area instead of pulling harder.
In this guide, you’ll learn how to check your lash and adhesive instructions, gather the right supplies, clean your hands and eye area, loosen stubborn adhesive, release false lashes gently, and remove leftover glue without scraping.
We’ll also cover post-removal cleanup, natural-lash checks, irritation warning signs, compatible oil-based removers, reuse care, and what to do when you are unsure about the removal method.
You’ll also find answers about removal frequency, natural-lash loss, and links to dedicated guides for different false-lash types. Read through before removing your lashes so each step is clear.
Check the Lash and Adhesive Removal Instructions First
Before removing your false eyelashes, check the product packaging or manufacturer’s removal instructions for both the lashes and adhesive you used.
False-lash systems do not all use the same attachment method or removal products, so a technique that works for one system may not be appropriate for another.
Follow any directions about the recommended remover, application method, and required contact time before attempting to loosen the lashes.
A common mistake is assuming every false lash can simply be pulled away or treated with the same remover; if the adhesive has not released properly, this can increase resistance and unnecessary tugging around your natural lashes and delicate eye area.
If the lashes resist removal, stop and recheck the product instructions rather than increasing force.
Gather All Your Supplies
Before you begin removing your false eyelashes, set out everything you may need so you can work slowly without interrupting the process once the adhesive starts to loosen.
Depending on the lash system and its instructions, this may include the recommended lash remover or an eye-area-appropriate makeup remover, clean cotton pads or swabs, a clean soft cloth, and a mirror with good lighting.
Keep the original lash case nearby if the lashes are designed to be reused.
Avoid automatically reaching for household oils, harsh cleansers, or improvised tools simply because they are convenient; use only products and accessories that are appropriate for the eye area and compatible with your particular lash and adhesive system.
Wash Your Hands and Clean the Eye Area
Before removing your false eyelashes, wash your hands thoroughly and make sure the eye area is reasonably clean and accessible.
You do not need to perform a full facial cleanse simply to begin lash removal, but heavy eye makeup, dirt, or product buildup around the lash line can make it harder to see where the false lashes and adhesive are attached.
If needed, gently remove makeup that interferes with the removal process using a product suitable for the eye area. Keep any cotton pads, swabs, applicators, or other tools you use clean as well.
Avoid touching or working around your eyes with unwashed hands, since bacteria from the hands can be transferred to the eye area.
A clean setup gives you better visibility and reduces unnecessary contamination while you work.
Soften the Lash Adhesive With an Appropriate Remover
If your false eyelashes do not begin to release easily, soften the adhesive with a remover that is suitable for the eye area or specifically recommended for your lash and adhesive system.
Apply the remover carefully around the bonded area according to the product directions and give it enough contact time to loosen the adhesive before attempting removal.
Avoid assuming that every lash requires an oil-free, oil-based, or homemade remover, because compatible removal products can vary between systems.
The key is not to compensate for a stubborn bond by pulling harder. If you still feel resistance, pause and allow the appropriate remover more time to work rather than tugging at the false or natural lashes.
Keep the remover out of the eye itself and use only products intended for use around the eye area.
Gently Release the False Eyelashes Without Pulling
Once the adhesive has loosened, release the false eyelashes slowly and with as little force as possible, following the removal direction recommended for your particular lash system.
Work gradually rather than yanking, twisting, or trying to detach a resistant section in one motion.
Pay attention to what you are holding so you do not accidentally tug your natural lashes along with the false ones.
If any part of the lash remains firmly attached, stop instead of increasing the pulling force; apply the appropriate remover again as directed and give the adhesive additional time to soften before continuing.
Gentle, controlled removal helps reduce unnecessary stress on the natural lashes and delicate eye area and can also help preserve reusable falsies from avoidable stretching or distortion.
Remove Any Remaining Adhesive Gently
After the false eyelashes are removed, check the lash line and surrounding skin for any adhesive that remains behind.
Use the remover recommended for your adhesive or another product intended for the eye area, applying it gently with a clean cotton pad or swab as the product directions allow.
Give stubborn residue time to soften before wiping it away instead of scratching it with your fingernails, picking at it, or rubbing the eyelid aggressively.
These actions can unnecessarily irritate the delicate eye area, and the FDA specifically advises avoiding scratches to the eyeball or other sensitive areas when removing eye cosmetics. Keep the remover out of the eye itself.
If some adhesive does not release easily, soften it again rather than using additional force.
Clean the Eye Area After Removal
After the false eyelashes and visible adhesive have been removed, gently clean the eye area to clear away any remaining remover, makeup, or loosened residue.
Follow the directions for the cleanser or eye-area remover you used rather than assuming that a full double-cleansing routine is always necessary.
Use light wiping or rinsing motions around the eyelids instead of repeatedly rubbing the lash line, and keep cleansing products out of the eyes themselves.
If residue remains, soften and remove it gradually rather than scrubbing more aggressively. The goal is simply to leave the eyelids and lash line clean and comfortable after removal, not to cleanse the area more times than the products or your skin require.
Check Your Natural Lashes and Eye Area After Removal
Once removal and cleanup are complete, take a moment to check your natural lashes, lash line, and surrounding eyelid skin.
Make sure no obvious adhesive remains stuck to the skin or natural lashes, and look for unusual redness, swelling, or irritation rather than immediately applying another set of falsies.
Do not pick at small patches of stubborn residue or pull on natural lashes to remove them; soften any remaining adhesive with an appropriate eye-area remover instead.
Mild temporary sensitivity can occur after working around the eye area, but persistent or significant irritation should not simply be ignored.
The FDA advises stopping use of an eye cosmetic if it causes irritation and seeking medical attention if the irritation persists.
Extra Tips for Removing False Lashes at Home
Don’t Pull Harder if the Lash Resists
If part of a false lash remains firmly attached, treat the resistance as a sign to stop rather than a reason to pull harder.
Pause the removal process, apply the appropriate eye-area or product-recommended remover as directed, and give the adhesive more time to soften before trying again.
Forceful tugging can catch or pull your natural lashes, irritate the delicate eyelid area, and distort reusable falsies.
A common mistake is repeatedly pulling at the same resistant spot because most of the lash has already released; instead, work only on the section that is still bonded. The safest practical rule is simple: pause, soften, then retry gently rather than increasing force.
Keep Makeup Remover Away From the Eye Surface
Use makeup remover around the bonded lash area without allowing it to enter the eye itself.
Apply only the amount needed with a clean cotton pad or swab, following the remover’s directions, and keep your eye comfortably closed when the product instructions call for it.
Do not saturate the lash line so heavily that liquid runs toward the eye, and avoid rubbing if the adhesive does not release immediately.
The American Academy of Ophthalmology advises keeping eye-makeup remover out of the eyes and thoroughly removing it from the eyelids afterward.
If remover does get into your eye and causes ongoing discomfort or irritation, stop the removal process rather than continuing to add more product.
Don’t Scrape or Pick at Stubborn Adhesive
If adhesive remains after the lashes are removed, do not scrape it away with your fingernails, tweezers, or other hard tools.
Instead, apply the appropriate eye-area or product-recommended remover and allow the residue to soften before gently wiping it away.
Repeated picking or aggressive rubbing can irritate the delicate eyelid area and increases the chance of accidentally catching the skin or natural lashes.
If a small patch still will not release, repeat the softening process rather than increasing pressure.
Follow the Care Instructions Before Reusing Your False Lashes
If your false eyelashes are designed to be reusable, check their specific cleaning and storage instructions before preparing them for another wear.
Lash fibers, bands, adhesives, and reusable systems can require different care, so one cleaning method should not be assumed to work for every product.
Remove residue only as directed, handle the band and fibers gently, and allow any required cleaning or drying process to finish before storing the lashes.
Proper care can also help prevent you from damaging the shape of a reusable lash while trying to clean it.
Read Here: can you clean and reuse false eyelashes
Stop if You Develop Significant Irritation
Stop the removal process if you develop significant burning, pain, redness, swelling, or other concerning irritation around the eye rather than continuing to apply remover or manipulate the lashes.
False eyelashes and their adhesives are used on a particularly delicate area, and some people can experience irritation or allergic reactions.
The FDA advises stopping an eye cosmetic immediately if it causes irritation and seeking medical attention if the irritation persists.
Use Oil-Based Removers Only When They’re Compatible
Oil-based removers can be appropriate for some false-lash adhesives, but do not assume that coconut oil, baby oil, or another household oil is suitable for every lash system.
Instead, check the adhesive or lash manufacturer’s removal instructions and use an eye-area product that is compatible with that system.
Some dedicated lash removers contain oils as part of formulations specifically designed to help loosen adhesive, while other lash systems may call for a different type of remover.
If an oil-based product is permitted, apply it only as directed and keep it out of the eye itself. The important principle is compatibility with the adhesive—not simply whether a product contains oil.
Ask a Professional if You’re Unsure About the Removal Method
If you cannot identify the lash system, do not know which adhesive was used, or the lashes remain firmly attached despite following the available instructions, avoid experimenting with stronger solvents or increasing the pulling force.
Different temporary lash systems can use different bonding methods, and professional eyelash extensions require different removal considerations altogether.
In uncertain situations, a qualified lash professional can help determine the appropriate removal approach instead of risking unnecessary stress on your natural lashes or eye area.
This is especially important when the product instructions are unavailable or the attachment does not behave like a typical temporary false-lash system.
How Often Should You Remove False Eyelashes
There is no single removal schedule that applies to every type of false eyelash. How often you should remove them depends on the lash system, adhesive, and intended wear duration specified by the manufacturer.
Some temporary lashes are designed for short wear, while other systems are specifically formulated for extended wear.
Do not keep false eyelashes on longer simply because they still appear firmly attached; extending wear beyond the product instructions may not match how that lash and adhesive were designed to be used.
Check the recommended wear period when you apply the lashes and remove them according to those directions. If you experience significant discomfort or irritation sooner, remove the lashes as appropriate rather than waiting for the normal wear period to end.
Will False Eyelashes Remove Your Natural Lashes
False eyelashes should not automatically pull out your natural lashes when they are removed correctly, but forceful removal can put unnecessary stress on natural lash hairs.
The risk increases if a false lash is pulled while the adhesive is still strongly bonded or if natural lashes have become caught in the adhesive.
Repeated tugging can fracture natural lashes and may damage the lash follicle, according to the American Academy of Ophthalmology. If you feel resistance during removal, do not compensate by pulling harder.
Stop, soften the adhesive with the appropriate remover for your lash system, and try again gently once the bond has loosened. This reduces unnecessary traction on both your natural lashes and the surrounding eye area.
False Eyelash Removal Guides by Lash Type
The safest way to remove false eyelashes can vary depending on how the lashes are attached, the adhesive system used, and the manufacturer’s removal instructions.
This guide covers the general principles of gentle false-lash removal, but each lash type may require a different technique or compatible remover.
For detailed instructions, use the removal guide that matches the lashes you are wearing:
- How to Remove Strip Lashes
- How to Remove Individual Lashes
- How to Remove Cluster Lashes
- How to Remove Magnetic Lashes
Following the guide for your specific lash system helps you avoid applying a removal method designed for a different type of false eyelash.
Professional eyelash extensions should also be treated separately from temporary falsies rather than removed using a general at-home false-lash method.
Conclusion
Safe false-eyelash removal is less about speed and more about using the right remover, minimizing force, and paying attention to how the lash responds.
Start by checking product instructions, keep your hands and tools clean, soften adhesive when needed, and release the lashes gradually. If residue remains, remove it gently instead of scraping or rubbing the eyelid.
Afterward, clean the eye area, inspect your natural lashes, and stop if you develop persistent irritation. Because false-lash systems differ, avoid treating every adhesive or lash type the same way.
Follow the manufacturer’s wear and removal guidance, and use the removal guide for your specific lash type when you need more detailed instructions.