
Published On: 26 August 2026
Removing individual lashes may look simple, but the wrong approach can make the process more difficult and put unnecessary stress on your natural lashes.
Since individual lashes are attached separately through adhesive at the lash base, safe removal requires more than simply pulling the visible lash pieces.
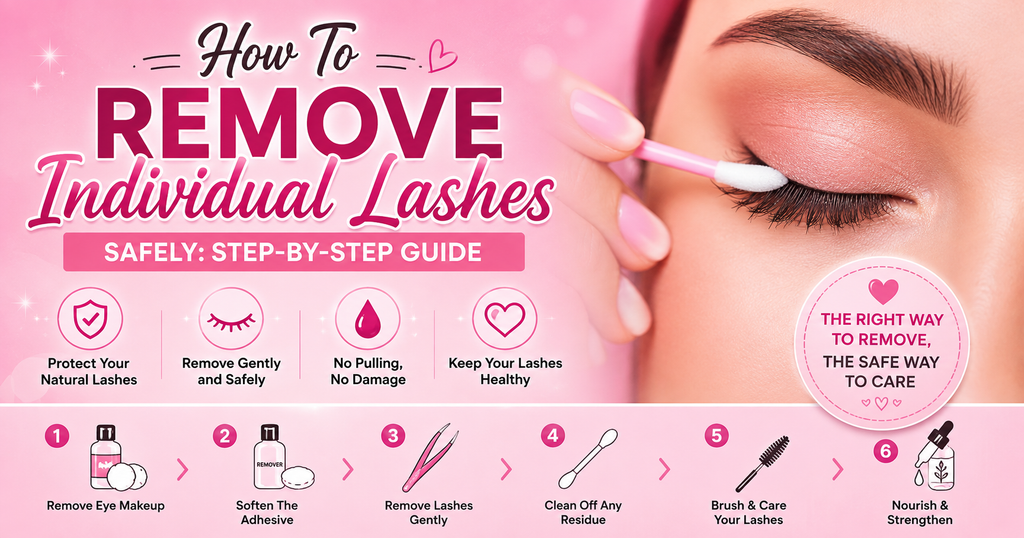
In this guide, you will learn how to prepare the correct tools, clean the lash area, soften the adhesive bond, and remove individual lashes gently from the natural lash line.
The article also explains what to do when lashes do not come off easily, how to remove leftover adhesive residue, how to protect your natural lashes after removal, and the common mistakes you should avoid during the process.
What Are Individual Lashes
Individual lashes are small false-lash pieces that are applied separately along the natural lash line instead of using one continuous lash strip. Their separate placement gives you more control over lash length, density, spacing, and overall eye shape.
Individual lashes are available in different styles, including single fibers, flares, and small multi-fiber clusters.
If you want to understand their types, application, wear time, safety, benefits, drawbacks, and styling options in more detail, read our complete guide on What Are Individual Lashes.
Can You Remove Individual Lashes At Home
Yes, you can remove individual lashes at home when you are removing suitable DIY individual lash products and follow a careful removal process.
The main goal is to loosen the adhesive bond first and remove each lash piece gently instead of pulling directly on the attached lashes.
DIY individual lash removal requires patience because each lash piece is attached separately along the natural lash line.
The correct removal technique is important when removing individual lashes at home because improper pulling can create unnecessary tension on the natural lashes.
The individual lash type should be considered before attempting home removal because not all lash systems use the same application method or adhesive strength.
DIY individual lashes are generally designed for home application and removal, while professional lash extensions may involve stronger adhesive systems that require professional removal.
Beginners often assume that every individual lash product can be removed in the same way because the lash pieces look similar. This can lead to using an unsuitable removal approach for the specific lash system.
To remove individual lashes at home more safely, identify the lash type, use suitable removal products, soften the adhesive first, and avoid forcing any lash piece that does not release easily.
What You Need Before Removing Individual Lashes
Preparing the required tools before removing individual lashes helps make the process more controlled because each lash piece needs to be loosened and removed carefully.
Having the correct items ready reduces unnecessary pulling and allows you to focus on protecting the natural lash line during removal.
A lash remover or suitable makeup remover is needed to help soften the adhesive holding individual lash pieces in place.
Cotton pads are useful for applying remover around the eye area and gently cleaning loosened adhesive residue after lash removal.
Cotton swabs provide more precise control when applying remover near individual lash attachment points.
A mirror helps you clearly identify individual lash pieces and observe the natural lash line during the removal process.
A clean spoolie can help separate natural lashes and remove small residue after individual lash removal.
A gentle cleanser helps remove remaining makeup, remover, or residue from the eye area after completing the removal process.
Preparing these tools before starting allows individual lash removal to be performed with better control and reduces the chance of rushing through the process.
Remove Eye Makeup Before Taking Off Individual Lashes
Removing eye makeup before taking off individual lashes helps create a clearer and more controlled removal process.
Makeup products around the lash line can hide the attachment points of individual lash pieces, making it harder to identify where each lash is connected.
The eyeliner should be removed before individual lash removal because eyeliner along the lash line can cover the areas where individual lashes are attached.
The mascara should be removed before loosening individual lashes because mascara can make natural lashes and added lash fibers stick together.
The lash area should be gently cleaned before removal because leftover makeup residue can interfere with seeing the adhesive points clearly.
The individual lash attachment points should be visible before applying remover because each lash piece is connected separately to the natural lash line.
Beginners often try to remove individual lashes over existing eye makeup because they want to save time.
To prepare for safer removal, clean the eye area first and make sure the individual lash attachment points are visible before attempting to loosen the adhesive.
Soften The Adhesive Bond Before Removing Individual Lashes
Softening the adhesive bond before removing individual lashes is an important step because the lash pieces are attached to natural lashes through adhesive at the lash base.
The removal process should focus on weakening this attachment first rather than applying force directly to the lash pieces.
The individual lash adhesive creates a connection between the lash base and the natural lash fiber, which keeps the added lash piece attached during wear.
The adhesive bond should be softened before attempting to remove individual lashes because a weakened bond requires less pulling force during the removal process.
The lash remover or suitable removal product should be applied around the individual lash base because this is the area where the adhesive attachment is formed.
The softened adhesive allows the individual lash piece to release more easily because the connection between the added lash and natural lash becomes less resistant.
The natural lash should be protected during removal because pulling an individual lash while the adhesive bond is still strong can transfer force directly to the attached natural lash.
Beginners often try to remove individual lashes by pulling the visible lash fibers because they focus on the added lash rather than the adhesive connection at the base. This approach can make removal harder and may place unnecessary stress on the natural lash.
To remove individual lashes more carefully, soften the adhesive bond first, allow the product time to work, and avoid forcing any lash piece that remains firmly attached.
Apply Lash Remover And Allow Time For The Adhesive To Loosen
Applying lash remover correctly helps weaken the adhesive holding individual lashes in place and makes the removal process more controlled.
The remover should work on the lash base area before any attempt is made to separate the individual lash piece from the natural lash.
The lash remover should be applied carefully around the individual lash base because this is the area where the adhesive connection is located.
The lash remover should be given enough time to work because the adhesive bond may not loosen immediately after application.
The individual lash piece should not be pulled immediately after applying remover because the adhesive may still be strong at the attachment point.
The waiting time for lash remover depends on the product formula, the adhesive used, and how strongly the individual lash is attached.
The removal process should be approached slowly because individual lashes are attached separately and each lash base may require different amounts of time to loosen.
Beginners often try to remove individual lashes as soon as remover is applied because they expect the adhesive to release instantly. This approach can make removal more difficult because the bond may not have weakened enough.
To make individual lash removal easier, apply the remover around the lash base, allow sufficient time for the adhesive to loosen, and avoid forcing any lash piece that remains attached.
Remove Individual Lashes Gently From The Natural Lash Line
Removing individual lashes gently is the most important step after the adhesive bond has been softened because each lash piece is attached separately to an individual natural lash.
The removal process should focus on releasing each attachment point carefully instead of pulling multiple lash pieces at once.
The individual lash pieces should only be removed after the adhesive has loosened because a softened bond allows the lash to separate with less resistance.
The individual lashes should be removed gently from the natural lash line using controlled movements rather than pulling quickly.
The lash pieces should be removed one section at a time because individual lashes do not share one continuous band like strip lashes.
The natural lashes should be protected during removal by avoiding direct pulling on the lash fibers.
The individual lash base should be checked before removal because the attachment point determines whether the lash piece is ready to release.
Beginners often try to remove all individual lashes quickly because multiple lash pieces may appear loose after the remover is applied. This approach can disturb areas where the adhesive bond has not fully weakened.
To remove individual lashes safely, loosen each attachment point first, remove released lash pieces gently, and work through the lash line gradually.
What To Do If Individual Lashes Do Not Come Off Easily
Individual lashes that do not come off easily usually indicate that the adhesive bond has not weakened enough for safe removal.
Forcing a lash piece away from the natural lash should be avoided because the problem is usually related to the remaining adhesive attachment rather than the removal technique.
The individual lash should not be pulled harder when it remains attached because increased force can transfer tension to the natural lash supporting the lash piece.
The lash remover should be reapplied around the individual lash base if the attachment remains firm after the first application.
The individual lash should be given more time after applying remover because some adhesive bonds require longer exposure before they become easier to release.
The adhesive bond should be reassessed before attempting removal again because a firmly attached lash piece may simply need more softening rather than more pressure.
The individual lash removal process should remain slow and controlled because each lash piece has its own attachment point along the natural lash line.
Beginners often increase pulling force when a lash piece does not release immediately because they assume the removal method is not working. This approach can create unnecessary tension when the actual issue is that the adhesive has not loosened sufficiently.
To remove stubborn individual lashes more safely, soften the adhesive again, wait longer, and only remove the lash piece once it begins to release without force.
Remove Remaining Adhesive Residue After Individual Lash Removal
Removing individual lashes does not always eliminate every trace of adhesive from the lash line.
Checking and cleaning leftover residue after removal helps maintain comfort and prepares the natural lashes for future lash applications.
The natural lash line should be checked after removing individual lashes because small amounts of adhesive may remain attached to natural lash fibers.
The remaining adhesive residue should be removed gently because rough rubbing around the lash line can irritate the sensitive eye area.
A suitable remover or gentle cleansing product can be used around the lash area to help remove leftover adhesive buildup.
The surrounding eye area should be cleaned after removing adhesive residue because leftover product or makeup can create discomfort around the lash line.
The remaining adhesive should be removed before applying new individual lashes because residue can affect how future lash pieces sit on the natural lashes.
Beginners often stop the removal process after taking off the visible lash pieces because they assume all adhesive has already been removed. Hidden residue around the lash base can remain and may affect comfort if it is not cleaned properly.
To complete individual lash removal, check the lash line carefully, remove leftover adhesive gently, and clean the surrounding area before applying any new lash products.
How To Protect Your Natural Lashes After Removing Individual Lashes
Protecting your natural lashes after removing individual lashes helps maintain a healthy lash line after the adhesive and added lash pieces have been removed.
The removal process can place temporary stress on the natural lashes, so gentle aftercare helps avoid unnecessary tension and irritation.
The eye area should not be rubbed after individual lash removal because friction can disturb the natural lash fibers and irritate the surrounding skin.
The natural lashes should not be pulled or manipulated unnecessarily after removal because repeated tension can affect the lash fibers that remain attached to the lash line.
The lash area should be kept clean after individual lash removal because leftover makeup, adhesive residue, or product buildup can affect comfort around the lash line.
The natural lashes should be given time to return to their normal condition after removing individual lashes because the lash line has gone through an application and removal process.
The natural lash condition should be observed after removal because changes in comfort, sensitivity, or appearance may indicate that the lash area needs additional care.
Beginners often focus only on removing the individual lashes and ignore the aftercare stage because the visible lash pieces have already been removed. This can overlook the importance of maintaining gentle habits after the removal process.
To protect natural lashes after individual lash removal, avoid rubbing, prevent unnecessary pulling, keep the lash area clean, and handle the natural lashes gently during the recovery period.
Common Mistakes When Removing Individual Lashes And How To Avoid Them
1. Pulling Individual Lashes Directly
Pulling individual lashes directly is a common removal mistake because the adhesive bond may still be holding the lash piece to the natural lash.
Individual lashes are attached separately, so removing them requires loosening each attachment point instead of using force to detach them.
Removing the lash while the adhesive is still intact can make the lash resist movement and increase removal difficulty.
Since the individual lash is connected through the adhesive bond, sudden pulling can place unnecessary stress on the natural lash fiber.
Focusing on the visible lash instead of the adhesive connection can make the removal process less controlled.
The adhesive bond should be weakened first because softened adhesive allows the individual lash piece to release with less resistance.
Beginners often pull individual lashes directly when they do not release immediately because they assume more force will remove the lash faster. This mistake can make removal harder because the adhesive bond remains active.
To avoid this mistake, soften the adhesive bond first, allow the remover time to work, and remove individual lashes only when they begin to release without force.
2. Removing Individual Lashes Before Adhesive Loosens
Removing individual lashes before the adhesive bond has loosened can make the removal process more difficult because the lash piece remains firmly attached to the natural lash.
Individual lashes require the adhesive connection at the lash base to weaken before they can be removed with less resistance.
A strong bond keeps the lash piece connected to the natural lash and prevents it from releasing easily.
Trying to move the lash before the bond weakens can make the removal process less controlled.
The lash remover should be given enough time to loosen the adhesive because the product needs time to work around the lash base. Waiting allows the attachment point to become easier to release without applying unnecessary pressure.
The individual lash removal process should not be rushed because different adhesive formulas may require different amounts of time to soften.
Beginners often attempt removal immediately after applying remover because they expect the lash pieces to release instantly. This approach can lead to repeated pulling attempts when the adhesive has not softened enough.
To avoid this mistake, allow the lash remover sufficient time to work, check whether the adhesive has loosened, and remove individual lashes only when they release with minimal resistance.
3. Rubbing The Eye Area During Removal
Rubbing the eye area during individual lash removal is a common mistake because the skin around the eyes is sensitive and the lash line requires gentle handling.
The removal process should focus on loosening adhesive and removing lash pieces carefully rather than creating friction around the eye area.
The eye area should not be rubbed repeatedly during individual lash removal because excessive friction can irritate the sensitive skin around the eyelids.
The rubbing motion can disturb the individual lash removal process because it does not directly target the adhesive attachment point.
The lash area should be handled with gentle pressing and controlled wiping motions because these movements reduce unnecessary stress during removal.
The cotton pad or cotton swab should be used carefully around the lash line because rough wiping can affect the comfort of the eye area after removal.
Beginners often rub their eyes during removal because they want to remove adhesive or lash pieces quickly. This approach can create irritation while still failing to properly release the individual lash attachment points.
To avoid this mistake, use gentle pressing and wiping motions, focus on the adhesive bond, and avoid unnecessary rubbing around the eye area during individual lash removal.
4. Using Unsuitable Products Around The Eye Area
Using unsuitable products around the eye area during individual lash removal can create problems because the eyelid and lash line are sensitive areas that require careful product selection.
The removal process should focus on loosening the adhesive safely while avoiding unnecessary irritation from incompatible products.
Products that are not intended for use around the eyes may cause discomfort or irritation during the removal process.
Using an unsuitable product may not effectively loosen the bond and can make the removal process more difficult.
Following the recommended instructions helps ensure the product is used correctly during removal.
The lash remover or makeup remover should be checked for eye-area suitability because individual lash removal requires applying products close to the sensitive eye region. Careful product selection helps maintain better control throughout the process.
Beginners often choose any available remover product because they focus only on dissolving the adhesive. This approach can overlook the importance of product compatibility with the delicate eye area.
To avoid this mistake, use products according to their instructions, choose formulas suitable for the eye area, and avoid applying products that are not designed for individual lash removal.
How Long Do Individual Lashes Last
Individual lashes can last from a single day to around two weeks, depending on the lash type, adhesive, application quality, and intended wear period.
Temporary individual lashes are often designed for short-term use, while longer-wear systems can stay in place for several days when applied and maintained correctly. Factors such as rubbing, water exposure, oil-based products, and poor adhesive contact can shorten retention.
If you want a detailed explanation of wear time, adhesive types, retention factors, and aftercare, read our complete guide on How Long Do Individual Lashes Last.
How to Apply Individual Lashes
Individual lashes are applied one piece at a time along the natural lash line using tweezers and a compatible lash adhesive.
Correct application depends on choosing suitable lash lengths, preparing clean natural lashes, controlling the amount of adhesive, and positioning each lash piece with even spacing and direction.
Building the lashes gradually can also help you maintain symmetry and avoid overcrowding the lash line. If you want detailed preparation steps, adhesive timing, placement techniques, styling guidance, and common mistakes to avoid, read our complete guide on How to Apply Individual Lashes.
Conclusion
Removing individual lashes safely depends on preparing properly, softening the adhesive bond, and avoiding forceful removal methods.
The process should focus on loosening each lash attachment point before removing individual lash pieces from the natural lash line.
Using suitable tools, allowing remover enough time to work, and cleaning leftover adhesive residue can make the removal process more controlled.
Avoiding common mistakes such as pulling lashes directly, rushing adhesive removal, rubbing the eye area, or using unsuitable products helps protect the natural lash area.
By following a careful approach, you can remove individual lashes while maintaining better control throughout the process.