
Published On: 26 August 2026
Applying individual lashes can seem difficult when you are unsure which lash length to choose, how much adhesive to use, or where each lash piece should be placed.
Unlike strip lashes, individual lashes give you more control because each lash piece is applied separately along the natural lash line. This guide explains how to choose individual lashes based on length, thickness, and base structure before application.
You will also learn how to prepare your natural lashes, organize your tools, apply adhesive correctly, place individual lashes with tweezers, and build volume gradually.
The article also covers common mistakes, including excess adhesive, incorrect lash length selection, and overcrowding the lash line.
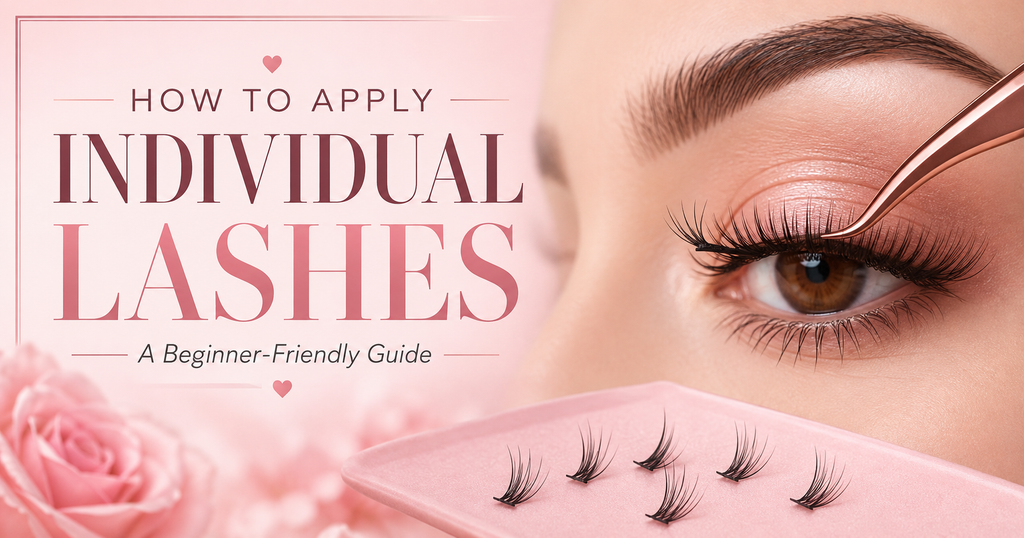
What Are Individual Lashes
Individual lashes are small false-lash pieces applied separately along the lash line, which gives you more control over placement, length, and fullness than a single strip.
Depending on the product, they may come as single fibers, flares, or small clusters designed for targeted application.
If you want to understand their types, application method, wear time, safety, benefits, and styling options in more detail, read our complete guide on What Are Individual Lashes.
How To Choose Individual Lashes Before Application
1. Consider The Individual Lash Length
Choosing the correct individual lash length helps create a balanced appearance because each lash piece is placed separately along the natural lash line. The lash length selection affects how natural, lifted, or dramatic the final lash style appears.
Short individual lashes are commonly used near the inner corner of the eye because this area naturally contains shorter lash fibers.
Medium individual lashes are often used through the center area of the lash line because they add visible definition while maintaining a balanced appearance.
Long individual lashes are commonly placed toward the outer area of the lash line when creating a more extended or defined lash style.
The individual lash length should match the desired style because shorter lengths usually create a softer look while longer lengths create a more noticeable lash effect.
The natural lash length should be considered before applying individual lashes because heavier or significantly longer lash pieces may not blend well with shorter natural lashes.
2. Think About Individual Lash Thickness
Individual lash thickness affects how much density and definition the lash set creates because thicker lash fibers appear more noticeable on the natural lash line. Selecting the right thickness helps control whether the final result looks soft and natural or more dramatic and enhanced.
Thicker individual lashes create a fuller appearance because the lash fibers occupy more visual space along the natural lash line.
Thinner individual lashes are often used when creating a more natural enhancement because they blend more easily with the existing natural lash fibers.
The natural lashes should be considered before choosing individual lash thickness because each natural lash has a limit to how much additional weight it can comfortably support.
The individual lash thickness should match the desired style because a soft everyday look usually requires a different density level than a bold, dramatic lash effect.
Beginners often choose individual lashes based only on the visual appearance of the lash fibers without considering how thickness changes the overall density of the lash line.
To achieve a balanced individual lash look, choose a thickness that complements the natural lashes and supports the desired level of volume and definition.
3. Check The Individual Lash Base Structure
The base structure of individual lashes affects how each lash piece sits on the natural lash and how visible the attachment point appears after application. The lash base connects the lash fibers together, so its design influences placement control, blending, and the overall finish of the lash look.
The individual lash base is the lower section where the lash fibers are joined together and where adhesive is applied during placement.
Knot-free individual lashes have a cleaner base appearance because the lash fibers are joined without a visible knot at the attachment point.
Knotted individual lashes contain a small knot at the base where the lash fibers are secured together.
The individual lash base design affects how close the lash piece can be placed to the natural lash line.
Beginners often focus only on lash length and thickness while ignoring the base structure of individual lashes.
To choose suitable individual lashes, consider the base structure along with length and thickness because these attributes work together to determine the final appearance and placement quality.
4. Choose The Correct Lash Adhesive For Individual Lashes
Choosing the correct lash adhesive is important when applying individual lashes because each lash piece requires controlled attachment to the natural lash line. The adhesive should provide enough hold for the individual lash while allowing accurate placement during the application process.
The lash adhesive used for individual lashes should be compatible with the specific lash system and application method.
The lash adhesive amount should be controlled because individual lashes require only a small attachment point rather than a large adhesive layer.
The individual lash base should receive enough adhesive to create secure contact with the natural lash without covering the surrounding lash area.
The lash adhesive consistency affects how easily individual lashes can be positioned during application.
Beginners often make the mistake of applying too much adhesive to individual lashes because they believe extra glue will create stronger attachment.
To achieve a cleaner individual lash application, use the recommended adhesive for your lash system and apply only the amount needed to secure each lash piece properly.
What You Need Before Applying Individual Lashes
Before applying individual lashes, prepare the required tools and products to make the placement process more controlled and accurate.
Individual lashes are applied as separate lash pieces, so having the correct tools helps you handle each lash, apply adhesive precisely, and position the lashes along your natural lash line.
- Individual lashes — Select individual lash pieces with suitable length, thickness, and style according to the desired lash appearance.
- Lash adhesive — Use an adhesive suitable for individual lash application to attach each lash piece securely.
- Lash tweezers — Helps you pick up and place individual lashes with better control during application.
- Mirror — Allows you to clearly view the natural lash line and check precise lash placement.
- Lash comb — Helps separate and blend natural lashes with individual lash pieces after application.
- Lash applicator (optional) — Provides additional grip and control when positioning individual lashes, especially for beginners.
Having these items prepared before starting allows you to focus on precise placement instead of interrupting the application process to search for tools.
Prepare Your Natural Lashes Before Application
Preparing your natural lashes before applying individual lashes helps create a cleaner surface for placement and allows each lash piece to sit more securely along the natural lash line.
Individual lashes require precise attachment, so removing anything that affects adhesive contact is an important preparation step.
The natural lashes should be clean before applying individual lashes because makeup residue and buildup can affect how the adhesive attaches to the lash surface.
The natural lash area should be free from oil and skincare residue because oily surfaces can reduce adhesive grip during individual lash application.
Eye makeup should be completed before applying individual lashes because applying products after placement can disturb the position of individual lash pieces.
Natural lashes can be curled before individual lash application when additional blending with the lash pieces is needed.
The natural lash condition should be checked before application because individual lashes are attached directly to existing lash fibers.
Prepare Individual Lashes And Adhesive Before Placement
Preparing individual lashes and adhesive before placement helps create a more controlled application process because each lash piece requires accurate handling and positioning.
Organizing the lash pieces before starting allows you to focus on placement instead of interrupting the process repeatedly.
The individual lashes should be separated and arranged before application because each lash piece needs to be picked and placed individually along the natural lash line.
The individual lash lengths should be organized before application because different areas of the eye may require different lengths to create a balanced individual lashes styles.
The lash adhesive should be prepared before picking up individual lashes because the adhesive texture affects how easily each lash piece can be attached.
The lash adhesive should not be applied in a rushed manner because individual lashes require precise control over the amount of glue placed on each base.
The individual lash pieces should be checked before placement to confirm their length, shape, and base condition.
A prepared workspace allows individual lashes to be applied with better accuracy because the process depends on placing multiple small lash pieces in the correct position.
Trim Individual Lashes To Match Your Natural Lash Style
Adjusting individual lash length before application helps create a more balanced appearance because each lash piece should complement the natural lash pattern.
Unlike strip lashes, individual lashes are already separated into smaller pieces, so trimming is only needed when a specific lash length does not match the desired style or natural lash direction.
The individual lash length should be adjusted carefully when a lash piece appears significantly longer than the surrounding natural lashes.
The individual lash direction should match the natural growth pattern of your existing lashes during selection and adjustment.
The individual lash pieces should be compared with nearby natural lashes before making any adjustment because each eye area may require different lengths.
The individual lash pieces should not be trimmed excessively because changing the original shape can affect how the lash fiber appears after placement.
Beginners often try to make all individual lashes the same length because uniformity seems easier to manage.
To achieve a more natural individual lash style, adjust only the lash pieces that require modification and maintain a balanced relationship between the individual lashes and your natural lash pattern.
Allow Lash Adhesive To Become Tacky Before Application
Allowing lash adhesive to become tacky before applying individual lashes helps improve placement control and reduces movement during attachment.
Individual lashes are small lash pieces that require precise positioning, so the adhesive texture plays an important role in keeping each piece where it is placed.
The lash adhesive should not be used while it is completely wet because the liquid glue can make the individual lash piece slide away from the intended position.
The lash adhesive should become slightly tacky before attaching the individual lash because a sticky surface provides better grip during placement.
The individual lash application process requires controlled adhesive timing because each lash piece is placed separately rather than as one complete strip.
The waiting time for lash adhesive depends on the adhesive formula, the amount of glue applied, and the surrounding conditions.
Beginners often place individual lashes immediately after applying glue because they expect wet adhesive to create a stronger attachment. This mistake can make the lash piece harder to control and may result in uneven placement along the lash line.
To achieve more accurate individual lash placement, wait until the adhesive reaches a slightly sticky texture before attaching each lash piece to the natural lash line.
Apply Individual Lashes With Tweezers Along The Natural Lash Line
Applying individual lashes with tweezers requires precise control because each lash piece is positioned separately along the natural lash line. The placement of each individual lash affects the final density, direction, and overall balance of the lash style.
The individual lash should be picked up gently with tweezers from the lash base rather than the fibers because the base is the area designed for adhesive attachment. Holding the lash piece correctly helps maintain its original shape and prevents damage to the delicate lash fibers.
The individual lash should be placed close to the base of the natural lash without attaching it directly to the eyelid skin.
The individual lash should follow the natural direction of the existing lashes because matching the growth pattern creates a more blended appearance.
The tweezers should be used to make small adjustments immediately after placement while the adhesive is still allowing minor movement.
The individual lash pieces should be placed with appropriate spacing because overcrowding can create an uneven and unnatural lash pattern.
Beginners often attach individual lashes too far from the natural lash base because they focus on avoiding contact with the eye area. This mistake can create visible gaps and reduce how naturally the individual lash blends with the existing lashes.
To achieve accurate placement, attach each individual lash near the natural lash base, follow the existing lash direction, and use tweezers to maintain control throughout the process.
Build Volume And Definition Gradually With Individual Lashes
Building volume with individual lashes allows more control over the final appearance because each lash piece is applied separately instead of using one fixed lash arrangement. This customization allows you to adjust the density, length distribution, and emphasis on different areas of the lash line.
Individual lashes allow you to control lash density because each lash piece can be added according to the desired level of fullness.
The individual lash pieces should be added gradually because applying too many lashes at once can make the lash line appear uneven or overloaded.
The middle area of the lash line can be customized with individual lashes to add definition and create a more noticeable eye appearance.
The outer corner of the lash line can be customized with individual lashes to create different styling effects, such as a more extended or lifted appearance.
Individual lashes provide more styling flexibility than strip lashes because separate lash pieces can be placed exactly where additional volume or definition is needed.
Beginners often add too many individual lashes quickly because they want immediate volume. This approach can hide the natural lash pattern and create an uneven result that appears less balanced.
To create a natural and controlled individual lash look, add lash pieces gradually, assess the density after each section, and build volume according to the desired style.
Let Individual Lashes Dry And Secure The Final Look
Allowing individual lashes to dry after placement helps the adhesive create a stronger attachment and gives the lash pieces time to settle into their final position.
The drying stage is important because individual lashes are attached separately, so each lash piece needs enough time to stabilize along the natural lash line.
The individual lash adhesive should be allowed to set after all lash pieces have been placed because moving the lashes too early can disturb their alignment.
The individual lash placement should be checked after the adhesive begins to set to identify any uneven spacing or misplaced lash pieces.
The individual lashes can be gently clamped or blended with the natural lashes when the application method and lash products allow it.
The lash applicator or suitable lash tool should be used carefully during blending because excessive pressure can disturb newly attached individual lash pieces.
Beginners often adjust individual lashes repeatedly after placement because they continue checking the position before the adhesive has stabilized.
To secure the final individual lash look, allow the adhesive to set properly, review the placement, and make only gentle finishing adjustments when needed.
Common Mistakes When Applying Individual Lashes And How To Avoid Them
1. Applying Too Much Lash Adhesive
Using too much lash adhesive is a common mistake when applying individual lashes because each lash piece requires only a controlled amount of glue at its base. Excess adhesive can affect the appearance, comfort, and accuracy of the final lash placement.
Applying excessive glue can create visible buildup around the lash base and make the individual lash appear less natural.
A thick adhesive layer can prevent the lash piece from sitting neatly along the natural lash line.
Excess glue can cause nearby lashes to stick together and reduce the separated, natural appearance that individual lashes are designed to create.
A cleaner lash base allows the individual lash fibers to blend more naturally with the existing lashes.
This approach can reduce placement control and make the lash arrangement look heavier than intended.
To avoid this mistake, apply only a small, controlled amount of adhesive to the individual lash base and ensure the lash piece is positioned accurately before the glue sets.
2. Applying Individual Lashes Before Adhesive Becomes Ready
Applying individual lashes before the adhesive reaches the correct texture can make the placement process more difficult because wet glue does not provide enough control over each lash piece.
Individual lashes require precise positioning, so adhesive consistency directly affects how accurately each lash can be placed.
The individual lash adhesive should become slightly tacky before placement because completely wet glue allows the lash piece to move after it touches the natural lash. A slippery adhesive surface can make it difficult to maintain the intended position along the lash line.
This movement can create uneven spacing, incorrect lash direction, or an unbalanced appearance.
The adhesive texture should be checked before attaching each individual lash because different formulas reach the tacky stage at different times. The waiting period can vary depending on the adhesive type, amount applied, and surrounding conditions.
The individual lash placement should be completed when the adhesive provides enough grip while still allowing minor adjustment..
Beginners often apply individual lashes immediately after adding adhesive because they assume faster placement creates stronger attachment. This mistake can cause repeated repositioning and may disturb nearby lash pieces that have already been placed.
To avoid this mistake, wait until the lash adhesive becomes slightly sticky before attaching individual lashes so each lash piece can be positioned with better accuracy and control.
3. Choosing The Wrong Individual Lash Length
Choosing the wrong individual lash length can affect the balance of the entire lash arrangement because each lash piece contributes to the overall shape and proportion of the lash line.
Individual lashes should complement the natural lash pattern instead of creating an uneven difference between the added lashes and existing lashes.
Using the same long lash pieces across every section can make the inner and middle areas appear less natural.
Selecting unsuitable lengths can change the intended lash style and make the final result appear disproportionate.
A large difference in length can make the individual lashes appear separate from the natural lash line.
Selecting a suitable length helps maintain a comfortable application while supporting a balanced appearance.
Beginners often choose individual lashes based only on how dramatic they look in the package without considering their natural lash length and placement area. This approach can result in a lash style that does not match the eye shape or desired finish.
To avoid this mistake, select individual lash lengths that complement your natural lashes and distribute different lengths according to the area of the lash line and the style you want to create.
4. Overcrowding The Natural Lash Line
Overcrowding the natural lash line can affect the balance and appearance of individual lashes because the technique depends on controlled placement of separate lash pieces.
Individual lashes are designed to build customized volume, so adding too many pieces without considering spacing can create an uneven and heavy-looking result.
Too many individual lashes placed on the natural lash line can make the lash arrangement appear dense and less natural because the added fibers may cover the natural lash pattern.
The individual lash density should be built gradually because adding multiple lash pieces in the same area can create uneven distribution across the lash line.
Applying excessive individual lashes can place additional stress on the natural lashes and may affect comfort during wear.
The individual lash placement should focus on creating the desired density rather than filling every available space along the lash line.
Beginners often add more individual lashes because they want faster volume and a fuller effect. This approach can make the lash line appear overloaded and may reduce the customized appearance that individual lashes are designed to provide.
To avoid overcrowding, add individual lashes gradually, maintain balanced spacing, and evaluate the lash density after each section before adding more pieces.
How to Remove Individual Lashes
Individual lashes should be removed carefully because pulling them off can place unnecessary tension on your natural lashes.
The safest method depends on the adhesive and lash system you are wearing, so removal instructions can vary between temporary and longer-wear individual lashes.
If you want to learn the correct removal steps, common mistakes to avoid, and how to protect your natural lashes during the process, read our complete guide on How to Remove Individual Lashes.
Conclusion
Applying individual lashes successfully requires careful selection, controlled adhesive use, and precise placement. Choosing the right lash length, thickness, and base structure helps create a balanced appearance before application begins.
Proper preparation of natural lashes, organized tools, and correct adhesive timing make the placement process easier and more accurate. Since individual lashes are applied separately, they allow greater control over density, placement, and styling compared with fixed lash arrangements.
Avoiding common mistakes such as using too much adhesive, choosing unsuitable lash lengths, or overcrowding the lash line helps maintain a more natural and comfortable result. Always follow the instructions provided with your specific lash products for the safest application.