Published On: 24 March 2025
Do you struggle with weak, brittle, or uneven nails? Are you tired of expensive salon visits just to get flawless, long-lasting nails? Whether you’re a fan of acrylic, gel, or press-on nails, mastering the art of applying fake nails at home can save you time, money, and frustration.
According to Dermatology Research and Practice, improper application of artificial nails like acrylic nails can weaken natural nails and increase the risk of infection.
However, when applied correctly with the right technique, fake nails can enhance nail strength and protect against breakage. A study by Soni Nanda & Chander Grover found that gel nails enhance appearance and strengthen cosmetically damaged nails.
With years of experience in nail care and beauty, our team has tested various methods to identify the most effective and safest ways to apply fake nails at home.
Whether you’re a beginner or an experienced DIY nail artist, this guide will provide expert-backed advice to ensure your nails look stunning and last longer.
By the end of this article, you’ll learn:
✅ The chemistry behind fake nail adhesion and how it affects longevity
✅ The essential tools needed for a perfect at-home manicure
✅ The nail glue vs. adhesive tabs: Which one is best for fake nail adhesion
✅ Alternative ways to apply fake nails without glue
Let’s dive in and transform your at-home nail game!
Chemistry Behind Fake Nail Adhesion Process
Fake nails are primarily composed of acrylic, gel, or poly gel materials, each with a distinct chemical composition.
According to Katri Suuronen & Team, Acrylic nails result from a polymerization reaction between ethyl methacrylate (EMA) monomer and polymethyl methacrylate (PMMA) polymer, forming a durable structure.
Gel nails consist of methacrylate-based oligomers and monomers that harden under ultraviolet (UV) or LED light due to photoinitiators triggering polymerization.
According to research by Elena Brambilla & Team, the chemistry behind the fake nail adhesion process involves cyanoacrylate-based adhesives, which undergo rapid polymerization upon exposure to moisture.
These adhesives, commonly found in nail glue, primarily consist of alcohol, cyanoacrylate, or photo-bonded methacrylate.
When the pre-polymer—composed of formaldehyde and alkyl cyanoacetate—is depolymerized, it yields the liquid monomer of cyanoacrylate.
Upon contact with water or hydroxyl (-OH) groups present in natural nails, cyanoacrylate rapidly polymerizes, forming strong molecular chains that ensure durable adhesion.
However, commercial cyanoacrylates used for DIY applications tend to have higher toxicity and can be more irritating to skin tissue.
What Are Items Required to Apply Fake Nails at Home
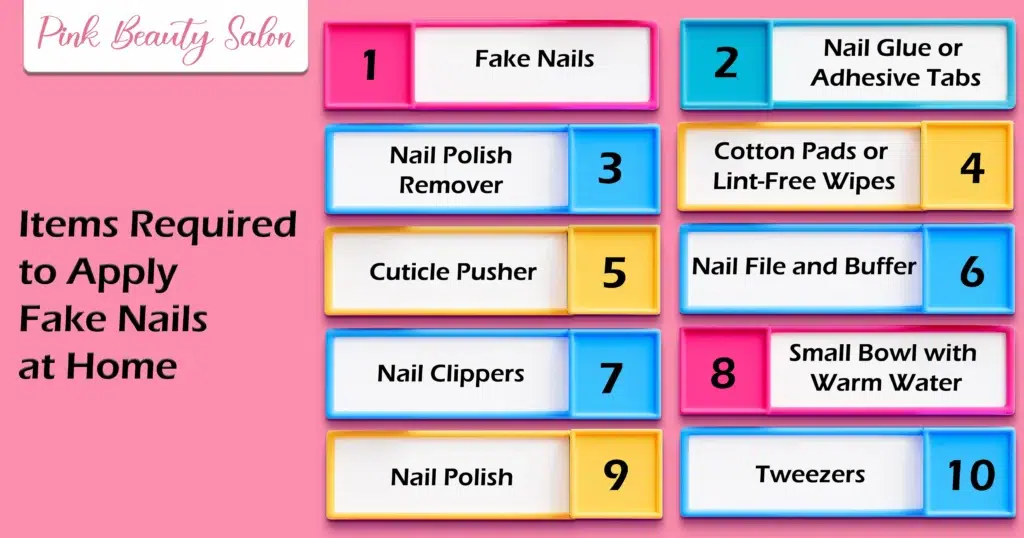
Achieving a flawless, salon-quality manicure at home requires the right tools. Each item plays a crucial role in ensuring a secure, long-lasting, and polished finish.
1. Fake Nails
Choose high-quality fake nails that match your desired shape, length, and style for better durability and comfort. Many home nail salons in Dubai offer home acrylic nails and home gel nails at reasonable prices—customized to your needs and preferences.
2. Nail Glue or Adhesive Tabs
A strong adhesive ensures a firm hold, preventing lifting or premature detachment. Adhesive tabs offer a temporary option, while nail glue provides a longer-lasting bond.
3. Nail Polish Remover or Rubbing Alcohol
Cleansing the nails before application removes oils, dirt, or leftover polish, allowing the adhesive to bond properly.
4. Cotton Pads or Lint-Free Wipes
Used with polish remover or alcohol, these eliminate residue and prep the nails without leaving fibers behind.
5. Cuticle Pusher (Metal or Wooden Stick)
Pushing back cuticles creates a smooth base, improving adhesion and ensuring a natural look. A well-prepped nail bed enhances longevity.
6. Nail File and Buffer
A file shapes both natural and fake nails, ensuring a precise fit. Buffing the nail surface removes shine and helps glue adhere better.
7. Nail Clippers or Small Scissors
Trimming natural nails prevents overhang, while adjusting false nails helps achieve a customized shape and length.
8. Small Bowl with Warm Water
Soaking fingertips softens cuticles, making them easier to push back for a cleaner application.
9. Nail Polish or Top Coat
Adding a top coat enhances shine and protects the nails. Customizing with polish allows for a fresh, unique look.
10. Tweezers
Useful for handling adhesive tabs, placing embellishments, or ensuring precise application of false nails.
Adhesive Tabs Vs Nail Glue: Which One is Best to Apply Fake Nails
Adhesive Tabs last for up to 48 hours, while Nail Glue lasts for up to 14 days.
Adhesive Tabs take around 5 minutes to apply, while Nail Glue takes about 10 minutes.
Adhesive Tabs provide a quick and mess-free application, while Nail Glue requires careful placement to prevent air bubbles.
Adhesive Tabs can be easily peeled off, while Nail Glue requires soaking in hot water for 10-15 minutes for removal.
Adhesive Tabs preserve both natural and press-on nails, while Nail Glue damages press-ons, making them a one-time use.
Adhesive Tabs allow press-on nails to be reused up to 5 times, while Nail Glue does not allow reusability.
Adhesive Tabs are best for those who frequently change nail designs, while Nail Glue is ideal for long-term wear, professional settings, and special events.
Adhesive Tabs are less durable, making them unsuitable for individuals with an active lifestyle or frequent exposure to water and oils, while Nail Glue provides stronger adhesion and longevity.
Adhesive Tabs reduce overall product waste, while Nail Glue results in more waste as press-ons cannot be reused.
Whether prioritizing longevity or convenience, selecting the right method enhances both nail appearance and durability.
Prepare Your Nails For Applying Fake Nails
Proper nail preparation is essential for ensuring that fake nails adhere securely and last longer, preventing early lifting or chipping. According to Nailpro, thoroughly cleaning and dehydrating the nail plate removes oils and moisture that can interfere with adhesion, creating an ideal surface for bonding.
This meticulous process enhances the durability of nail enhancements, reducing the likelihood of premature lifting or chipping.
Remove all traces of nail polish using a nail polish remover. Even if nails are bare, wipe them with remover to eliminate natural oils and residues, ensuring optimal adhesion.
Use antibacterial soap to remove dirt and oils from hands and nails. Dry them completely, as moisture weakens nail glue.
Cut nails to a short, even length to prevent uneven application. Shape them with a fine-grit file to match the curvature of the fake nails.
Lightly buff each nail using a fine buffer to remove shine and create a slightly rough texture. This enhances grip and prevents lifting.
Use a cuticle pusher to clear the nail bed. Avoid cutting cuticles, as this can lead to infections and compromised adhesion.
Apply a nail dehydrator or wipe each nail with isopropyl alcohol to remove any remaining oils. This step significantly improves the bond between natural and fake nails.
Before application, select and arrange fake nails for each finger. If needed, lightly file the edges for a more natural fit.
Some nail systems require a primer to enhance adhesion and prevent premature lifting.
Buff Your Nails
Buffing is a critical step that enhances adhesion and prevents premature lifting of fake nails.
A fine-grit buffer (180–240 grit) effectively removes shine without weakening the natural nail. This slight roughness allows glue or adhesive tabs to grip better, ensuring a secure hold. Avoid over-buffing, as excessive thinning weakens nails and affects durability.
After buffing, wipe away dust with a lint-free pad soaked in alcohol or acetone to create a clean, oil-free surface for optimal adhesion. Proper buffing extends wear time and contributes to a smooth, natural-looking manicure.
Push Cuticle Back
Gently pushing back cuticles ensures a smooth surface for fake nails, preventing lifting and improving adhesion. Use a cuticle pusher or an orange stick after softening cuticles with warm water or cuticle oil.
Avoid trimming, as cuticles act as a protective barrier against infections. Excessive cutting can lead to irritation, making nail application uncomfortable.
A properly pushed-back cuticle creates a seamless transition between the natural and fake nail, enhancing longevity and a salon-quality finish.
Wipe nails with alcohol or acetone afterward to remove any residue, ensuring maximum grip for adhesive.
Choose The Nail Size and Shape
Selecting the perfect nail size and shape ensures a natural fit, enhances comfort, and prevents lifting. Press-on nails should cover the natural nail completely without overlapping the skin.
If a perfect size is unavailable, opt for a slightly larger nail and file the edges for a precise fit. Small nails tend to pop off prematurely due to insufficient coverage.
Nail shapes such as square, almond, and coffin, should complement natural nail beds and personal style.
Taking time to match sizes and shapes guarantees a polished, long-lasting, and salon-quality manicure.
Attaching Fake Nails
After following all these steps, it’s time to apply the fake nails. Since fake nails come in different types, the application process also varies. However, the preparation process is the same for all fake nails, whether you are applying gel, acrylic, or press-on nails.
For applying any fake nail type, first, you need to prepare your natural nails by buffing them, pushing back the cuticles, and choosing the best nail size.
After that, the application process depends on the type of fake nails you are using. There are specific steps for each type, which we guided you through based on the nail type you have chosen. Follow the mentioned steps carefully for the specific nail type you are applying.
Apply Acrylic Nails
Selecting the right acrylic nail tips is essential for a natural and long-lasting application.
Choose tips that closely match your natural nail width, if an exact fit isn’t available, opt for a slightly larger tip and file the sides for precision. Before application, trim, file, and cleanse your natural nails to remove any oils or residue.
Apply a small drop of high-quality nail glue to the well of the acrylic tip, then position it so the bottom edge covers about one-third of your natural nail.
Press firmly for 10–15 seconds to secure the bond, ensuring no air bubbles form, as they weaken adhesion. If the tip lifts at the edges, gently pinch it down for a seamless fit. Once secured, trim the tips to your desired length and shape, refining edges with a file.
Acrylic application begins with proper liquid-to-powder consistency.
Pour monomer into a clean dappen dish and dip your acrylic brush in, pressing it against the bottom to release trapped air bubbles.
Lightly tap off excess liquid before dipping the brush tip into acrylic powder, swirling it to form a smooth, glossy bead.
A balanced consistency is crucial for even application.
Lightly press the brush onto a lint-free paper towel to remove excess liquid before placing the bead near the cuticle.
Using controlled strokes, guide the acrylic downward toward the nail tip, keeping the nail slightly tilted to avoid flooding the cuticles.
Flatten the brush to sculpt the acrylic smoothly, blending each stroke seamlessly.
Apply the acrylic in multiple beads, one near the cuticle, one at the apex for structure, and one at the free edge for balance.
Keep your brush clean by dipping it into the monomer between strokes to prevent clumping.
Repeat the process as needed, ensuring the final layer remains thin, even, and free of bumps for a flawless finish.
Acrylic drying time depends on temperature, humidity, and product formulation. Cooler environments slow polymerization, while warmer temperatures speed it up. Ideally, maintain a room temperature between 68–72°F (20–22°C) for optimal setting.
If it’s too cold, curing takes longer; if it’s too hot, the acrylic dries too quickly, making application difficult.
To check dryness, gently tap the nail—if it produces a crisp clicking sound, it’s fully cured. If the nail feels soft or makes a dull thud, allow more drying time. A nail fan or low-heat setting on a hairdryer can help speed up the process while ensuring an even, bubble-free finish.
Apply Gel Nails
Applying gel nail extensions involves a meticulous process to ensure durability, a flawless finish, and optimal nail health. The procedure begins with cleansing the natural nails using an alcohol-based prep solution to remove oils and residues that can interfere with adhesion.
Proper nail preparation significantly enhances the bond between the natural nail and the gel, reducing the risk of premature lifting.
Once the nails are prepped, a thin base coat is applied and cured under an LED or UV lamp, initiating a polymerization process that strengthens adhesion by cross-linking monomers into a durable structure.
For gel extensions, either nail forms or tips are applied to extend the nail length. If using builder gel, it is applied in layers, each cured separately to prevent uneven curing or heat spikes.
Builder gel provides a structurally strong enhancement while maintaining flexibility, making it preferable for long-lasting extensions.
After achieving the desired thickness and shape, the extensions undergo refining using a 180-grit nail file to smooth out irregularities, ensuring an even surface for color application.
The next step involves applying gel polish in thin layers, allowing proper pigment distribution and preventing air bubbles, which can compromise longevity. Each coat is cured for 30–60 seconds under an LED lamp or 1–2 minutes under UV light, depending on the formulation.
To seal the extensions and protect against chipping, a high-quality gel top coat is applied, covering the entire nail and capping the free edge. This enhances durability by preventing water absorption, a known factor in gel lifting.
The final curing process ensures a hardened, glossy finish resistant to mechanical stress. Once curing is complete, any residual sticky layer is wiped away with isopropyl alcohol, and cuticle oil is applied to restore hydration.
For Press on Nails
Applying press-on nails requires precision to ensure longevity and a natural appearance. Proper adhesion techniques significantly enhance wear time and durability.
To help ensure your press-on nails adhere, apply a thin layer of nail glue to both your natural nail and the fake nail. The glue in the press-on will naturally be drawn to the glue on your nail and they’ll “grab onto” each other, adding an extra layer of bonding.
Aligning the press-on nail just above the cuticle before pressing down firmly ensures a seamless fit, while holding it in place for 10–20 seconds allows the glue to set properly, reducing the risk of premature lifting.
Once all nails are applied, shaping them with a file enhances their aesthetic appeal, and removing excess glue prevents buildup that can weaken adhesion over time.
Finally, applying cuticle oil nourishes the surrounding skin and promotes nail health, as supported by dermatological studies emphasizing the benefits of hydration in preventing brittleness and breakage. Proper application and post-care not only extend the lifespan of press-on nails but also contribute to overall nail health.
Clean Excess Used Glue
To effectively remove excess nail glue after applying press-on nails, begin by soaking your nails in warm, soapy water mixed with a few drops of cuticle oil for approximately 15 minutes to soften the adhesive.
This method helps loosen the glue, making it easier to remove without damaging your natural nails. After soaking, gently scrape off the softened glue using a cuticle pusher or an orangewood stick.
For any remaining residue, apply a small amount of acetone-based nail polish remover to a cotton pad and rub it over the affected areas until the glue dissolves. Finally, wash your hands thoroughly and apply cuticle oil to moisturize and nourish the nails and surrounding skin
How Do You Apply Fake Nails Without Nail Glue?
Applying fake nails without glue is achievable through various alternatives that offer convenience and nail health benefits. Tack-it clay involves rolling a small amount into a thin layer, spreading it onto the natural nail, and pressing the fake nail firmly for a secure hold.
Adhesive tabs are pre-cut, double-sided sticky strips that adhere to the nail when pressed firmly, providing a strong yet damage-free bond.
Gel nail stickers work by peeling off the backing, placing them on the nail, and smoothing them out to create an instant adhesive layer.
Acrylic mixture, commonly used in salons, requires applying a layer of acrylic liquid and powder to the nail before positioning the fake nail for a long-lasting hold.
Liquid bandage, typically used for minor wounds, can be brushed onto the nail, allowed to become tacky, and then used as a temporary adhesive for fake nails. These methods provide practical, flexible solutions for various needs.
What Are Fake Nails?
Fake nails are artificial nail enhancements made from acrylic, gel, or press-on materials, designed to extend or strengthen natural nails. They come in various shapes, lengths, and styles to achieve a salon-quality manicure at home.
Acrylic nails are durable and strong, while gel nails offer a more natural, glossy finish. Press-on nails provide a quick, easy, and non-damaging alternative for temporary wear.
How To Remove Fake Nails At Home
Removing fake nails at home should always be done with care to protect your natural nails. Since removal methods can vary based on the type of fake nails, it’s important to follow a process suited to the material.
The key is to be gentle, avoid peeling, and focus on nail health. When in doubt, refer to a trusted guide on how to remove fake nails at home or consider professional help to ensure safe and damage-free removal.