
Published on: 25 June 2025
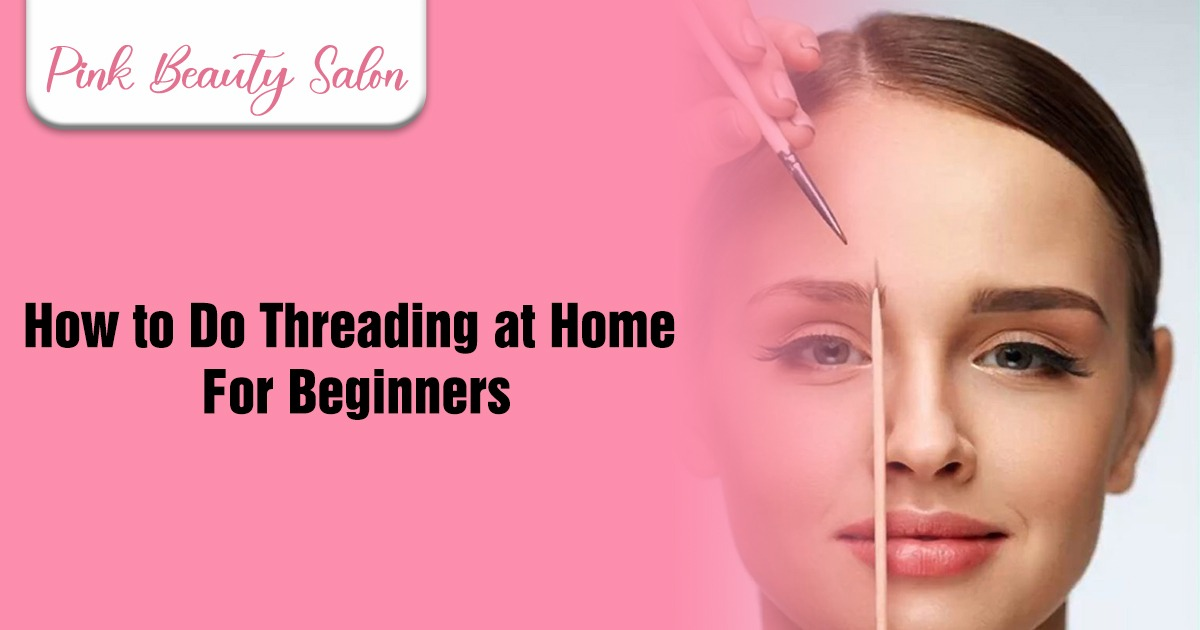
Threading is a simple, affordable, and effective way to remove unwanted facial or body hair at home.
In this guide, we’ll walk you through everything a beginner needs to know—from prepping the hair and creating the thread loop to mastering the twisting technique and safely removing hair.
We also answer common questions like whether you can do threading by yourself, if it’s safe at home, and how to perform facial threading effectively. With practice, anyone can learn this handy skill.
1. Prepare Your Hairs

Start by brushing the hair in the area you want to clean up, first brushing it upward to spot any strands that are noticeably longer. Hold them in place and carefully trim just the tips with small scissors.
Then, brush the hair downward and trim any parts that stick out from the natural shape. Be gentle and avoid cutting too much at once.
Once trimmed, brush the hair back into its usual direction. This simple grooming step makes the area look cleaner and more tidy, making it easier for any further hair removal methods like threading.
2. Create a Thread Loop
To begin threading, cut a piece of sewing thread about 10 to 11 inches long—use a slightly longer piece if you have larger hands or fingers. Fold the thread in half and tie the two ends together in a tight knot to form a large, loose loop.
Trim off any excess thread near the knot for a clean finish. It’s best to use 100% cotton thread, as it has the right texture and grip for removing hair effectively.
This loop will be used in the threading process to pull out unwanted hair, so make sure it’s secure and easy to handle.
3. Twist The Thread Loop
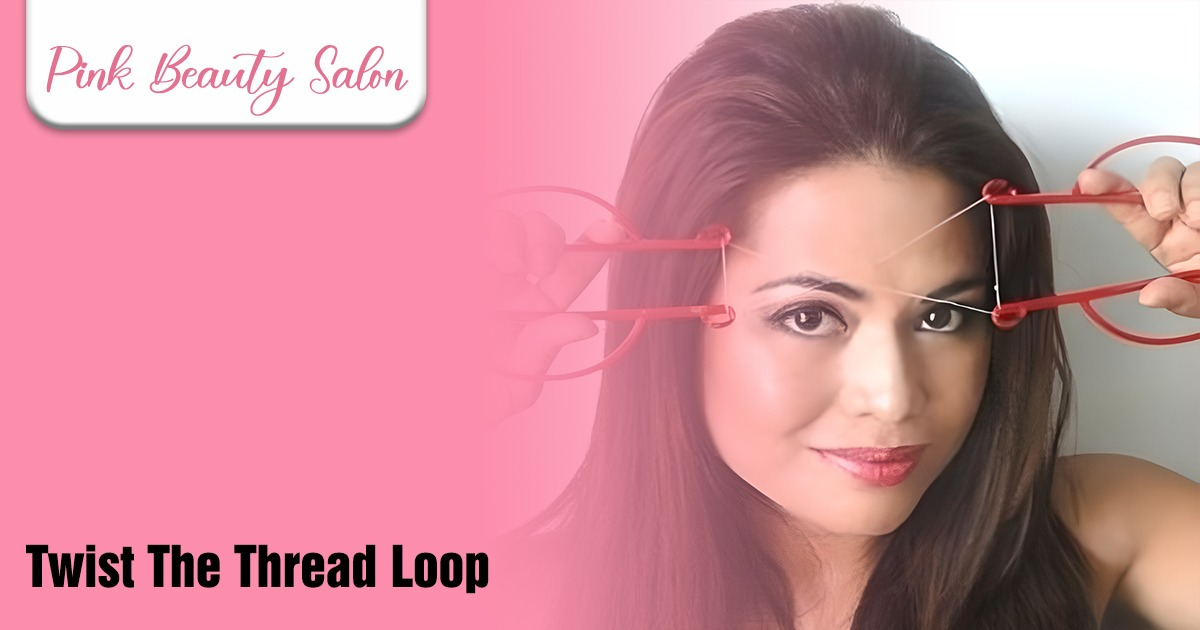
To prepare the thread for hair removal, insert two fingers (thumb and index) from each hand into the loop, keeping the knot off to the side or on a finger so it doesn’t get in the way.
Stretch the thread out between your hands so it forms a rectangle.
Then, keeping one hand still, use the fingers of the other hand to twist the thread around 4 to 7 times in the same direction.
This creates a tightly wound twisted section in the middle, with two open loops on either side.
The twisted part is what will grip and pull out the hair during threading. When you’re done twisting, you should see an “X” shape in the center with circles of thread on each side where your fingers are.
This setup is now ready for threading.
4. Start Removing Hair

To begin threading for hair removal, hold the looped thread with your index fingers and thumbs, one on each side, forming two open loops with a twisted section in the center.
Position the twisted center directly under the hair you want to remove, making sure it sits just below the surface of the skin.
Always thread in the opposite direction of hair growth—for most facial areas, this means moving the twist toward the nose or slightly upward.
To remove the hair, open the fingers on one hand while closing the other, causing the twisted section to roll over the hair and pluck it from the root.
For best control, use the hand below the area (such as under the brow) to move the twist by opening and closing your fingers quickly.
Place the unwanted hair into the “V” of the thread formed by the twist, then move the twist over it in a fast, smooth motion to grab and pull the hair out.
You can apply a light dusting of baby powder beforehand to reduce moisture and help the thread grip better.
Work from the top of the area downward, carefully aligning the twist before each pass. Go slowly if you’re new to threading, and avoid pulling harshly on the skin to minimize discomfort.
This same method can be used to remove hair from other facial or body areas, such as the upper lip or legs, and results typically last 2–3 weeks.
Can I Do Threading by Myself?
Yes, you can do threading yourself with practice and patience. Start by learning the proper hand movements to control the twisted thread and remove hair in the opposite direction of growth.
Use a mirror with good lighting, and go slowly to avoid mistakes.
Practicing on areas like your thigh can help you build confidence before moving to more sensitive areas like the face.
Is It Safe to Do Threading at Home?
Yes, it is generally safe to do threading at home if done correctly. Make sure to use clean, 100% cotton thread and wash your hands and skin before starting to prevent irritation.
Work in a well-lit area, be gentle to avoid skin damage, and avoid threading over broken or inflamed skin. With proper hygiene and technique, threading at home can be both safe and effective.
Can You Do Facial Threading at Home?
Yes, you can do facial threading at home with the right tools and technique. Using clean, 100% cotton thread and practicing the proper hand movements will help you safely remove unwanted facial hair.
Start slowly, use good lighting and a mirror, and be gentle to avoid skin irritation. With patience and practice, you can achieve effective results from home.
Best Home Service Threading in Dubai
Pink Beauty Salon offers the best home service threading in Dubai, delivering professional results with convenience. Our skilled beauticians ensure precise eyebrow shaping and facial threading in the comfort of your home.
Enjoy salon-quality service without stepping out—perfect for busy schedules and those who prefer at-home beauty care.
Conclusion
In conclusion, threading at home is a safe, cost-effective, and precise method for removing unwanted hair when done correctly.
By following the right steps—from preparing the hair and setting up the thread loop to practicing the twisting motion and removing hair in the correct direction—you can achieve clean, long-lasting results.
With a bit of patience and practice, even beginners can master this technique. Just remember to work gently, use clean materials, and take your time for the best outcome.