
Published On: 23 August 2026
Applying cluster lashes at home can look simple, but small mistakes during preparation, placement, and finishing can affect the final result.
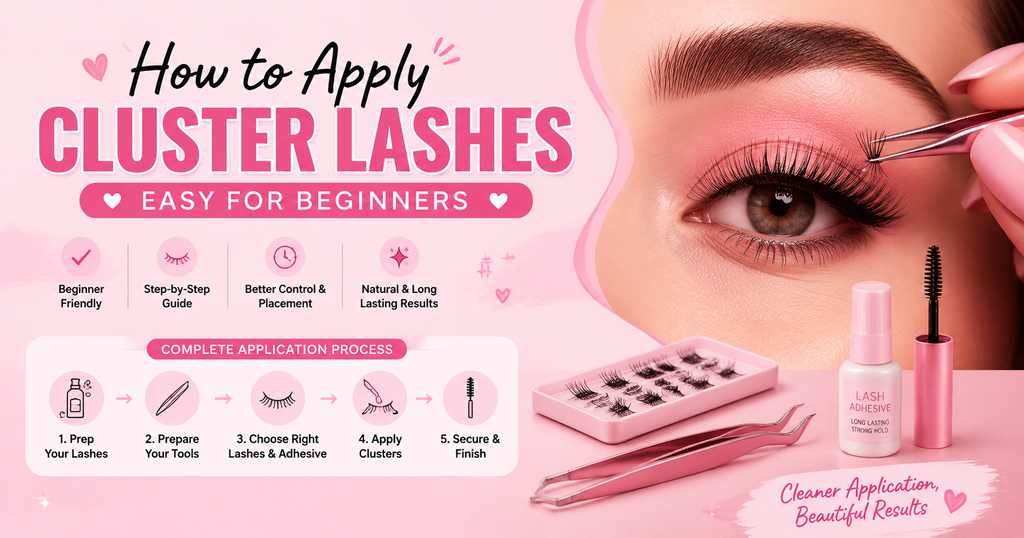
This guide explains the complete cluster lash application process, starting with preparing natural lashes, selecting suitable lash lengths and adhesive, and applying clusters with better control.
The article also covers important application techniques, including correct placement, lash mapping, securing clusters, and improving the final appearance through styling tips.
You will also learn how factors such as eye shape, adhesive setting, spacing, and application time influence the overall cluster lash experience.
Whether you are applying cluster lashes for the first time or improving your technique, this guide provides practical steps for a cleaner and more balanced application.
Step 1. Prepping Your Natural Lashes for Application
Clean Your Lashes
Cleaning your natural lashes before cluster lash application helps create a suitable attachment surface because cluster lashes depend on adhesive contact between the cluster base and your natural lashes.
Makeup residue, excess oil, and skincare buildup around the lash line can prevent the adhesive from making proper contact with the natural lash surface.
A clean lash line allows the cluster lash bond to attach more evenly and reduces unwanted barriers between the natural lashes and the adhesive.
Before applying clusters, gently cleanse the natural lashes and the surrounding eye area to remove impurities without irritating the lash line.
Avoid leaving oily residue behind because oils can affect adhesive performance and may reduce how securely the cluster lashes stay attached during wear.
Dry Thoroughly
Drying your natural lashes completely before cluster lash application helps create a more stable base because cluster lashes require a clean and moisture-free surface for the adhesive to form a secure bond.
Any remaining water or moisture around the natural lash line can dilute the adhesive or interfere with proper contact between the cluster lash base and individual natural lashes.
The drying process is especially important after cleansing because leftover moisture can prevent the adhesive from curing as expected.
Allowing the natural lashes to become fully dry before placement helps the lash clusters sit correctly and supports better attachment during application. A dry lash surface also makes it easier to control the placement angle and position each cluster accurately along the lash line.
Prime for Better Adhesion
Priming your natural lashes before cluster lash application can help create a better attachment surface because cluster lashes depend on strong adhesive contact between the cluster base and the prepared natural lash line.
A lash primer is used to remove remaining oils, residue, or impurities that may reduce how effectively the adhesive connects with the natural lashes.
The primer helps create a cleaner surface where the lash bond can attach more consistently during cluster placement.
This step is especially useful when natural lashes contain traces of makeup, skincare products, or oil buildup after cleansing. Preparing the lash surface properly before applying clusters can improve adhesive contact and support a more secure application process.
Step 2. Prepare Your Tools Before Application
Preparing your tools before cluster lash application helps create a smoother application process because the correct tools allow better control over lash placement, adhesive use, and cluster attachment.
Essential tools such as lash tweezers, a lash applicator, cluster lashes, and suitable adhesive should be arranged before starting to avoid interruptions during placement. Tweezers help pick up individual lash clusters without damaging their base, while a lash applicator can provide more controlled pressure when positioning clusters along the natural lash line.
Having the adhesive ready also allows you to apply the correct amount without rushing, which is important for creating a secure bond between the cluster base and natural lashes.
Organizing the tools beforehand helps maintain precision and reduces mistakes during the application process.
Step 3. Choosing the Right Lashes and Adhesive
Select the Right Length
Selecting the right cluster lash length helps create a balanced application because the length of each cluster affects how the lashes blend with your natural lash line and overall eye shape.
Cluster lashes are available in different lengths, and choosing a suitable size helps maintain a natural transition between the shorter inner lash area and the more defined outer lash sections.
Shorter clusters are often better suited for areas that need a softer blend, while longer clusters can add more visible length and definition when placed correctly.
The selected lash length should also match the strength and appearance of your natural lashes because heavier or longer clusters may place more stress on individual natural lashes.
Choosing the correct length allows cluster lashes to sit comfortably while creating a more seamless cluster lash map.
Pick the Right Adhesive
Picking the right adhesive for cluster lashes helps create a more secure application because the adhesive determines how effectively the cluster lash base connects with your natural lashes.
Cluster lash adhesives are designed with different bonding strengths, drying times, and wear purposes, so choosing a formula that matches your application method is important for achieving reliable attachment.
A suitable adhesive allows the lash cluster to stay positioned along the natural lash line without creating an unstable bond.
The adhesive should also be applied in the correct amount because insufficient adhesive may create weak contact, while excessive adhesive can affect comfort and make the clusters harder to control.
Allowing the adhesive to reach the proper tackiness before placement helps the cluster base attach more evenly and improves application accuracy.
Consider Your Natural Lash Strength
Considering your natural lash strength before cluster lash application helps create a more suitable lash placement because natural lashes provide the foundation that supports the added weight of each cluster.
Stronger natural lashes can usually provide a more stable attachment point for cluster lashes, while weaker or finer lashes may require lighter clusters to avoid placing unnecessary stress on individual lashes.
The thickness and condition of natural lashes also influence how the cluster base sits along the lash line and how comfortably the lashes blend with the added volume.
Selecting cluster lashes that match the capacity of your natural lashes helps maintain a balanced appearance and supports a more controlled application process.
A suitable match between cluster weight and natural lash strength can also help reduce tension during wear.
Step 4. Applying the Cluster Lashes
Use Tweezers
Using tweezers during cluster lash application helps improve placement accuracy because cluster lashes need controlled handling to position the lash base correctly along the natural lash line.
Tweezers allow you to pick up individual lash clusters without touching the fibers excessively, which helps maintain their shape and prevents damage to the cluster base.
Precise handling is important because each cluster should be placed carefully on the intended section of the natural lashes rather than overlapping unevenly with nearby clusters.
The pointed tip of tweezers also helps control the angle and distance during placement, allowing better alignment between the cluster base and natural lashes.
Careful tweezer use can make the application process more precise and help create a cleaner, more balanced lash arrangement.
Apply Cluster Lashes In Correct Area
Applying cluster lashes in the correct area helps create a balanced lash look because the placement of each cluster determines how the added volume blends with your natural lash line.
Cluster lashes are usually attached along sections of the natural lashes rather than directly on the eyelid skin, allowing the lash clusters to follow the natural direction of lash growth.
The placement should match the desired lash map, with shorter clusters often working well toward the inner corner and longer clusters adding definition toward the outer corner when creating more dramatic styles.
Each cluster should be positioned with enough spacing to avoid unnecessary weight concentration on a small number of natural lashes.
Proper placement helps the cluster base sit securely and allows the lashes to blend more naturally with your existing lash pattern.
Choosing Placement by Eye Shape
Choosing cluster lash placement according to eye shape helps create a longer-lasting lash application because the placement pattern affects how evenly the lash clusters sit across the natural lash line.
Each eye shape has different contours, spacing, and visible lid areas, which can influence how cluster lashes should be distributed for a balanced result.
For example, round eyes may benefit from placement that creates a more elongated appearance, while hooded eyes may require careful positioning to prevent heavier clusters from pressing against the eyelid area.
The natural lash direction also affects placement because clusters should follow the existing lash growth pattern instead of creating unnecessary tension.
A suitable placement plan helps maintain comfort, improves overall balance, and allows the adhesive bond to support the clusters more effectively throughout wear.
Create a Balanced Lash Map
Creating a balanced lash map helps make cluster lashes last longer because proper placement distributes the weight and shape of the lash clusters more evenly across the natural lash line.
A well-planned lash map considers factors such as eye shape, natural lash strength, and the desired final eyelash style before applying each cluster.
Placing heavier or longer clusters on weaker natural lashes can create additional stress on individual lashes, which may affect retention and comfort.
A balanced lash map allows the lash clusters to follow the natural eye structure while maintaining a consistent appearance.
The lash lengths should gradually transition across different areas of the lash line instead of creating sudden weight changes.
Careful planning before application helps each cluster sit more naturally, reduces unnecessary tension, and supports a cleaner, more stable lash finish.
Choose the Right Angle
Applying cluster lashes at the correct angle helps create a natural-looking and secure application because the angle of each cluster determines how well the lash fibers follow the direction of your natural lash growth.
Cluster lashes should be placed with the base aligned properly against the natural lashes while keeping the fibers facing outward in the intended direction.
An incorrect angle can make the clusters appear uneven, create gaps along the lash line, or prevent the lash base from sitting comfortably against the natural lashes.
Using tweezers or a lash applicator allows better control over the placement angle during application.
A consistent angle across multiple clusters helps maintain a smoother lash map and creates a more blended appearance between the added clusters and natural lashes.
Press and Hold
Pressing and holding cluster lashes after placement helps make cluster lashes last longer because this step allows the adhesive to create a stronger connection between the cluster base and the natural lashes.
After positioning each cluster, gentle pressure helps the adhesive contact the natural lash surface more evenly. This step is especially important because movement immediately after placement can disturb the adhesive bond before it becomes stable.
A lash applicator or tweezers can help apply controlled pressure without shifting the cluster position.
The holding time depends on the adhesive formula being used because different lash adhesives have different setting speeds.
Avoid pressing too aggressively because excessive pressure can flatten the lash fibers or move the cluster away from its intended position. A controlled press-and-hold technique helps improve attachment stability and creates a cleaner final lash appearance.
Step 5: Securing the Lashes in Place
Use a Lash Applicator
Using a lash applicator helps make cluster lashes last longer because the tool allows more precise placement and reduces unnecessary movement during application.
A lash applicator provides better control over the cluster base, which helps the adhesive create proper contact with the natural lashes.
Fingers can make accurate placement more difficult because they may transfer oils or apply uneven pressure around the lash line.
The applicator also helps position clusters closer to the desired area without disturbing nearby lashes that are already attached.
A controlled grip allows you to adjust the angle, spacing, and pressure during placement while keeping the lash fibers in their intended shape.
Careful use of a lash applicator supports a cleaner application process, improves placement accuracy, and helps create a more stable attachment between cluster lashes and natural eyelashes.
Seal the Look
Sealing cluster lashes after application helps make cluster lashes last longer because the sealing step supports the adhesive bond and helps keep the clusters stable during wear.
A lash sealer creates an additional layer around the attachment area, which can help protect the bond from daily exposure to moisture, oils, and friction.
The sealer should be applied carefully because excessive product near the lash line can add unnecessary weight or affect the appearance of the lash fibers.
A thin and even application allows the cluster lashes to maintain their shape while supporting the connection between the lash base and natural eyelashes.
The timing of sealing also matters because the adhesive needs enough time to set before additional products are applied.
Proper sealing helps improve lash durability, maintain a cleaner finish, and support longer-lasting cluster lash results.
Check Cluster Attachment and Comfort
Checking cluster attachment and comfort after application helps make cluster lashes last longer because early adjustments can prevent problems that may weaken the lash bond over time.
After placing the clusters, each attachment point should be inspected to ensure that the lash base is properly connected with the natural lashes.
Loose edges, uneven placement, or clusters that feel heavy can indicate that the attachment needs correction before the adhesive fully sets.
Comfort is also an important part of a successful application because cluster lashes should not create excessive pulling or pressure on individual natural lashes. The lash clusters should feel lightweight and follow the natural direction of the eyelashes.
A careful check after application helps identify placement issues early, supports better retention, and creates a more comfortable wearing experience.
Tips to Follow While Applying Cluster Lashes: Do’s & Don’ts
Picking the Right Style for Your Eye Shape
Picking the right cluster lash type and style for your eye shape helps create a more balanced application because the lash design should match the natural structure of your eyes.
Different eye shapes have unique features, such as lid space, eye width, and natural curvature, which affect how cluster lashes appear after placement.
Choosing the correct lash style allows the clusters to enhance your eyes while maintaining a comfortable fit.
The right style considers factors like cluster length, curl, and volume before application. A suitable lash pattern helps distribute the clusters evenly across the lash line and prevents certain areas from appearing too heavy.
Applying a style without considering eye shape can create an unbalanced look and may add unnecessary weight to specific natural lashes. A well-matched cluster lash style supports a cleaner finish, better comfort, and a more natural-looking result.
Blending and Styling for a Seamless Finish
Blending and styling cluster lashes helps create a seamless finish because proper integration allows the clusters to look more natural with your existing eyelashes.
After placement, the cluster bases and lash fibers should blend smoothly with the natural lash line instead of appearing separated or uneven.
Using a lash applicator or gentle brushing technique can help align the lash fibers and create a more uniform appearance.
The styling process also involves checking the spacing, direction, and balance of each cluster. Adjusting uneven clusters before the adhesive fully sets can help maintain a cleaner lash shape. Poor blending can make cluster lashes appear bulky, disconnected, or unnatural.
A careful blending technique improves the overall appearance, keeps the lash style balanced, and creates a polished finish that looks more consistent with the natural eyelashes.
Using a Lash Sealer for Extra Hold
Using a lash sealer for extra hold helps cluster lashes last longer because the sealer supports the adhesive bond after the clusters are applied.
A lash sealer creates a protective layer around the attachment area, which can help reduce the impact of moisture, oils, and daily friction on the lash bond.
Applying the sealer carefully around the cluster base helps maintain the connection between the cluster lashes and natural eyelashes without affecting the lash shape.
The amount of sealer used is important because too much product can add unnecessary weight or create buildup around the lash line.
A light and even application helps preserve the appearance of the lash fibers while supporting better retention. Skipping this step may leave the adhesive bond more exposed to external factors, which can affect how securely the clusters remain attached.
A properly applied lash sealer helps maintain a cleaner finish and supports longer-lasting cluster lash wear.
Avoid Applying Too Many Clusters Close Together
Avoiding too many cluster lashes close together helps create a better application because proper spacing allows each cluster to attach securely to the natural lashes without creating unnecessary weight in one area.
When multiple clusters are placed too close together, the combined weight can put extra pressure on individual natural lashes and may affect comfort during wear.
A balanced gap between cluster lashes helps the adhesive bond maintain proper contact with the natural lashes and allows the lash line to keep a more natural appearance.
The spacing also helps prevent clusters from overlapping, which can make the lash style look bulky or uneven. Applying too many clusters in a small area can create excess tension and may reduce the overall stability of the application.
Careful spacing supports better weight distribution, improves comfort, and helps cluster lashes maintain a cleaner, longer-lasting finish.
Don’t Touch Lashes Before Adhesive Sets
Not touching cluster lashes before the adhesive sets helps create a stronger application because the adhesive bond needs time to stabilize between the cluster base and the natural lashes.
After placement, unnecessary movement can shift the position of the clusters and disturb the connection before the bond becomes secure.
Avoid rubbing, adjusting, or pressing the lashes repeatedly during the setting period because these actions can weaken the attachment points and affect the final lash arrangement.
The adhesive setting time depends on the specific lash adhesive formula, so following the product instructions helps achieve better results.
Allowing the cluster lashes to remain undisturbed helps maintain proper spacing, preserve the lash shape, and support longer-lasting wear. Touching the lashes too early can cause clusters to move, loosen, or create an uneven finish.
Avoid Using Excess Adhesive
Using the correct amount of adhesive helps cluster lashes create a secure and comfortable attachment because the adhesive layer directly affects how the lash cluster connects with the natural lashes.
Excess adhesive does not always create a stronger bond because too much product can increase weight, create uneven attachment, and make the lash base feel uncomfortable.
A controlled amount of adhesive allows the cluster base to sit properly against the natural lashes and helps maintain a cleaner appearance after application.
Too much adhesive can also spread beyond the attachment area, which may cause clusters to stick together or affect the natural lash movement.
Applying excess adhesive can make the removal process more difficult because the stronger buildup may require additional care to separate the cluster from natural lashes.
Using the recommended amount of adhesive supports better placement, comfort, and a more natural-looking finish.
First-Timers May Take 20–30 Minutes
The application time for cluster lashes can vary depending on your experience level, lash style, and application method.
First-time users may need around 20–30 minutes because they need extra time to prepare the natural lashes, choose suitable cluster sizes, apply each lash carefully, and adjust the placement for a balanced look.
The preparation stage can take additional time because clean lashes and proper adhesive application are important for creating a secure attachment.
Beginners may also spend more time checking the lash angle and spacing to avoid uneven placement. Rushing the process can lead to misplaced clusters, an unnatural appearance, or the need for corrections.
Taking enough time during the first applications helps beginners understand how cluster lashes work and develop better control over the application process. A careful approach usually creates a cleaner and more comfortable final result.
You’ll Start Working Faster as You Gain Experience
Cluster lash application usually becomes quicker as users gain more experience with lash placement, adhesive control, and styling techniques.
Familiarity with cluster lash lengths, eye shape, and application tools allows users to make decisions faster during each step.
Experienced users often spend less time selecting clusters and adjusting placement because they understand which lash styles work best for their desired look.
Improved control over tweezers or lash applicators also helps create more precise attachment without repeated adjustments.
However, faster application should not replace careful technique because proper placement, adhesive control, and secure attachment still determine the final result.
Building experience helps users complete the process more efficiently while maintaining a neat and comfortable cluster lash appearance.
Conclusion
Applying cluster lashes successfully requires more than simply attaching lash pieces to your natural lashes. A careful process helps create better placement, comfort, and a cleaner final appearance.
Preparing the lash surface, choosing suitable lengths and adhesive, using proper tools, and following controlled placement techniques all contribute to a more balanced result.
The finishing steps are equally important because spacing, styling, sealing, and allowing adhesive time to set can influence how well the clusters perform during wear.
With practice and attention to detail, cluster lash application becomes easier while helping you achieve a more polished and comfortable lash style.