Published On: 31 May 2025
You don’t need a fancy salon appointment to give your hands and feet the love they deserve. With the right tools, steps, and a little patience, you can achieve salon-like results right from the comfort of your home. Doing your own manicure and pedicure at home not only saves money but also gives you full control over hygiene, style, and comfort.
In this guide, we’ll walk you through each step of a perfect DIY mani-pedi. To do manicure and pedicure at home:
- Clean Your nails
- Buff Your nails
- Remove The Dead Skin
- Apply Base Coat
- Apply Nail Polish Coats
- Apply Top Coat
- Clean The Excess Polish
Moreover in this article, you’ll also find pro tips for long-lasting results, a list of tools you’ll need, and insights into different types of manicures and pedicures.
Whether you’re a beginner or just need a refresher, this article has everything to help you pamper yourself at home!

Different Types of Manicure and Pedicure
There are many types of manicures and pedicures available today to suit different styles and needs. Popular manicure options include the French manicure, gel manicure, dip powder manicure, basic manicure, shellac manicure, acrylic manicure, classic manicure, and reverse French manicure.
For pedicures, you can choose from gel pedicure, stone pedicure, paraffin pedicure, chocolate pedicure, ice cream pedicure, margarita pedicure, athletic pedicure, fish pedicure, heat pedicure, waterless pedicure, spa pedicure, and basic pedicure.
There are also specialized treatments like spa manicures and acrylic nail extensions, as well as the elegant French pedicure.
Pink Beauty Salon offers home service manicure and home service pedicure in Dubai, so you can enjoy professional care in the comfort of your space.
Essential Tools and Products for a Salon-Quality Manicure at Home
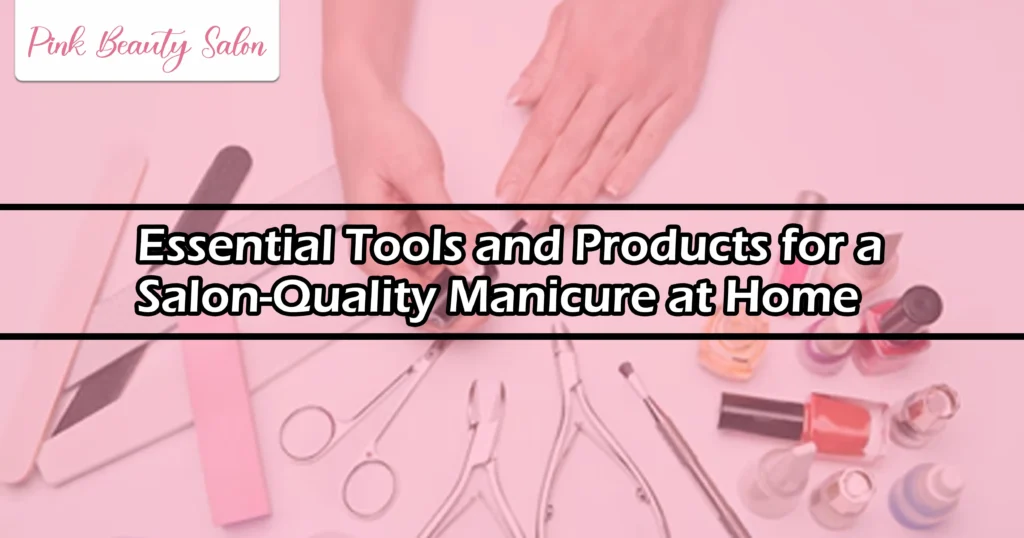
During your at-home manicure and pedicure, you’ll mostly be using tools and products such as:
- Water
- Acetone
- Nail polish remover
- Nail file
- Nail buffer
- Nail cutter
- Cuticle oil
- Epsom salt
- Tapered head attachment (if using an electric tool)
- Scrub
- Base coat
- Nail polish
- Top coat
Step to Do Manicure and Pedicure at Home
Step 1: Clean The Nails
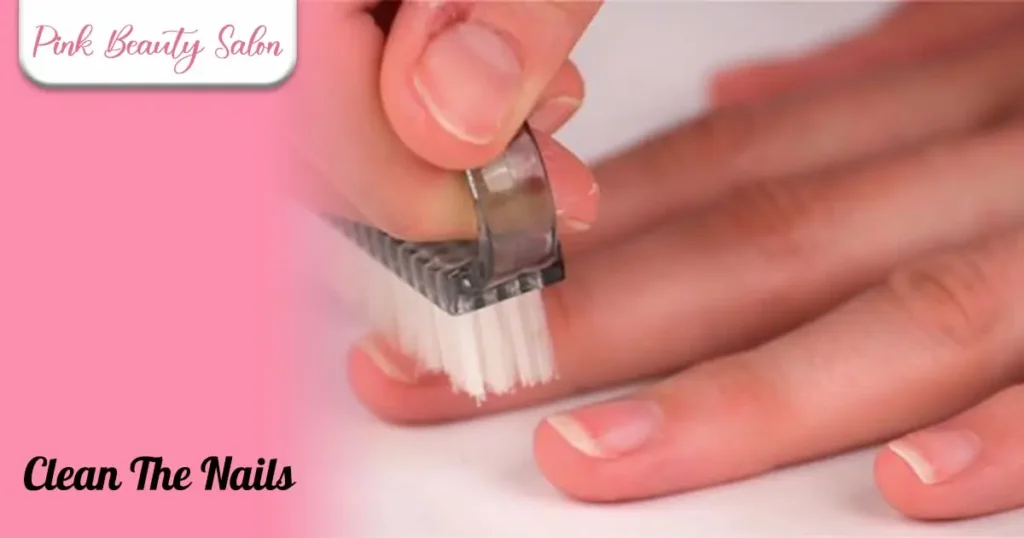
The very first step while doing a proper manicure or pedicure at home is cleaning your nails. This step is essential because if your nails are dirty then any polish or other products you apply won’t adhere properly to the surface of your nails.
Dirt and oil on your nails prevent products from bonding well, which means your manicure or pedicure won’t last long.
Moreover, research by Marta Zofia Wałaszek and Team clearly indicates that proper hand hygiene significantly reduces bacterial growth on the nail plate. That’s why starting with clean nails isn’t just about looks—it’s also about hygiene and longevity.
To clean your nails, you can follow a few simple methods. First, wash your hands and nails thoroughly. This helps remove dirt and oil and gives you a clean base.
If there’s any old nail polish on your nails, remove it using a nail polish remover or by soaking your nails in acetone. However, it’s better to use an acetone-free nail polish remover, as it cleans your nails without drying them out.
Step 2: Buff Your Nails
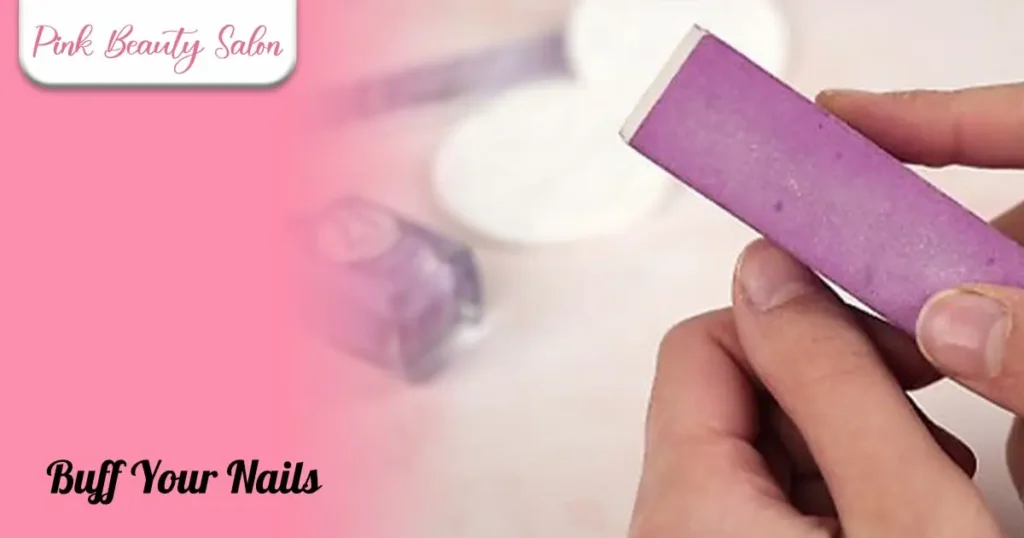
Once you’ve cleaned and prepped your nails, the next essential step is buffing. This is the stage where you determine both the length and shape of your nails—whether you prefer an oval, square, or round look.
Use a nail buffer or a sandpaper-style nail file to gently shape your nails and smooth out rough edges.
Glide the file across the nail tips in one direction for shaping, and gently move it left and right on the surface to remove any leftover residue or uneven texture.
For added precision, use the buffer around the nail edges and tips for a clean, polished finish.
Buffing not only ensures a salon-like result but also helps strengthen your nails and maintain their health in the long run.
According to Sinyderm, buff your nails once every three to four weeks to maintain smoothness and shine without compromising nail health.
Step 3: Make Your Skin Soft & Smooth by Removing Dead Skin
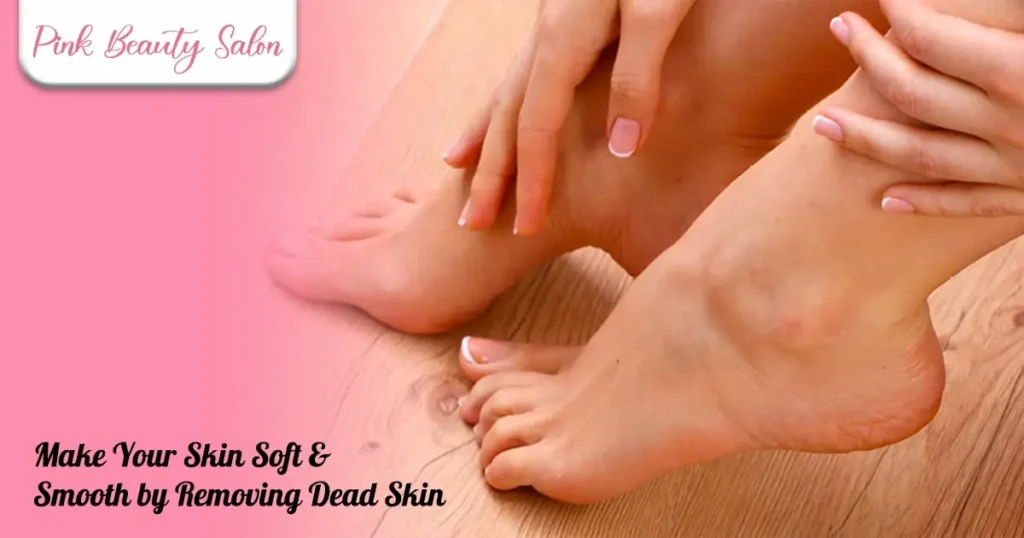
After shaping your nails, the next important step in doing a manicure and pedicure at home is softening the skin around your nails. This step is essential because soft, smooth skin enhances the beauty of your hands and feet, making them look more attractive and well-groomed.
Moreover the dead skin is removed around the nails in this step. According to NIVEA, dead skin is a natural part of the body’s renewal cycle. It often appears as rough, dry, or flaky patches on the outermost layer of the skin.
Due to the presence of dead skin, rough areas may develop cracks, and according to HealthShots, bacteria can enter through these splits. That’s why it’s important to remove dead skin while doing a manicure and pedicure—not just for beauty, but also to maintain healthy nails and skin.
To make your skin soft and healthy, follow these simple steps:
- Apply Cuticle Oil:
Gently massage cuticle oil onto your nails for 3 to 5 minutes. This helps nourish the skin and gives your nails a well-defined look. You can also use a cuticle stick to gently push the cuticles back in an angled motion for a cleaner, neater nail shape.
- Soak Your Nails:
Soak your hands or feet in warm water mixed with a teaspoon of Epsom salt for 5 to 10 minutes. This helps loosen any dead skin and removes dirt, leaving your nails clean and fresh.
- Use a Tapered Head Attachment:
If you have an electric manicure tool, use the tapered head attachment to work around the nail bed. This removes dead skin and gently pushes back the cuticles.
- Exfoliate with a Pumice Stone or Scrub:
To remove dead skin and smoothen rough areas like heels and knuckles, use a pumice stone or a quality foot scrub. This step also helps reduce tanning and makes the skin around your nails smoother and more polished.
- DIY Scrub for Hands and Feet:
You can easily make an exfoliating scrub at home to remove dead skin. In a bowl, mix:
- 1/2 cup sugar (white or brown, both work)
- 1/2 cup oil (olive oil or coconut oil)
- Optional: a few drops of essential oils like tea tree, peppermint, vanilla, or lavender for fragrance and added benefits
- Take a few tablespoons of this homemade scrub, massage it gently onto your hands and/or feet, and rinse with warm water.
For about 10 minutes, massage the area to promote healthy blood flow. This will help heal the skin after the rough exfoliation that has just occurred.
All these methods are very important for softening the skin around your nails, removing dead skin, keeping it nourished, and protecting the cuticles.
By following them, your manicure and pedicure will have a salon-like finish.
Step 4: Apply a Base Coat
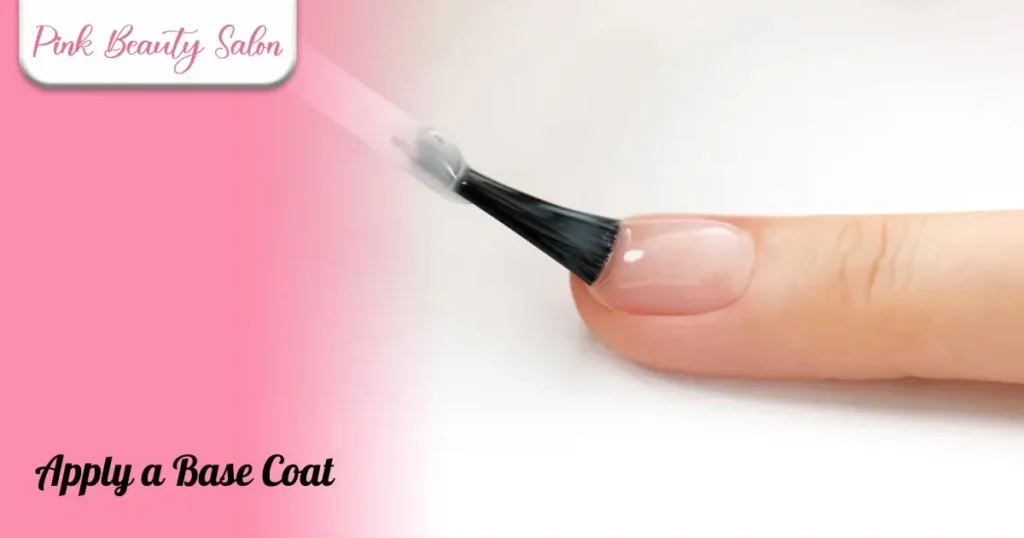
Now that your skin is clean, your nails have been shaped, dead skin has been removed, and the cuticles and surrounding skin have been softened and smoothed, the next step in doing a manicure and pedicure at home is applying a top coat to your nails. Apply the top coat and wait for at least 5 minutes to dry it.
Applying a top coat is essential because it helps preserve the natural shine of your nails. Moreover, it acts as a protective layer, shielding the nail surface from the harsh chemicals found in nail polish.
As a result, your nails are less likely to become brittle and it also helps in preventing nail discoloration. Moreover, according to nsi nails, A base coat acts as the nail foundation, ensuring that the subsequent layers of polish adhere properly and last longer.
Step 5: Apply Nail Polish
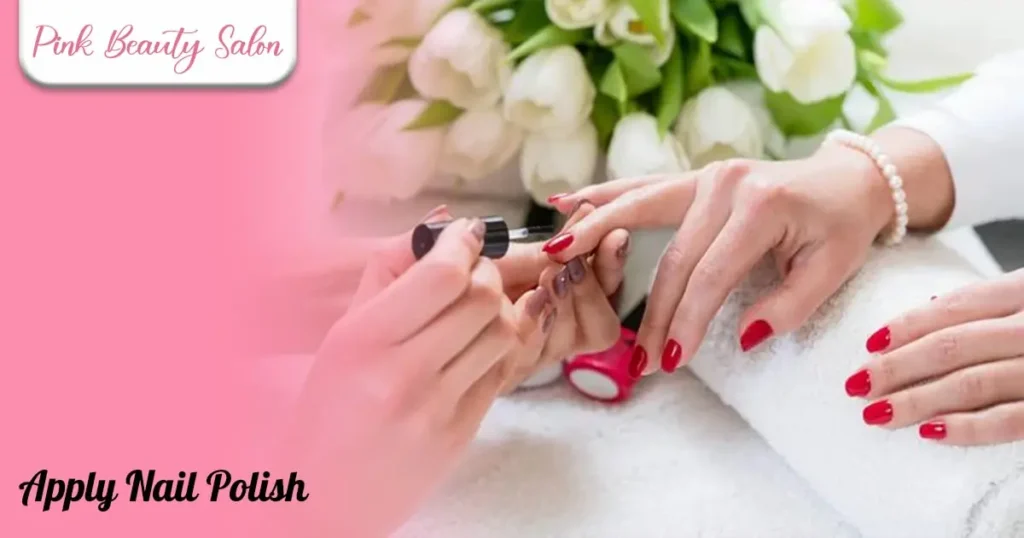
Choose a good-quality nail polish brand and apply the polish evenly to your nails. You’ll need to apply 2 to 3 coats of nail polish, but make sure to wait at least 5 minutes between each coat to let it dry properly before applying the next one.
It’s very important to always apply thin layers of nail polish. Thin coats last longer, look smoother, and are less likely to chip.
Follow these simple steps to apply nail polish correctly:
- Dip the brush into the nail polish bottle and place a small dot of polish near the base of your nail, just above the cuticle.
- Start at the base and gently stroke the brush to the left side, then to the right side, and finally down the center.
- Three strokes per nail are usually enough—just make sure each one is a thin, even coat!
Step 6: Apply Top Coat
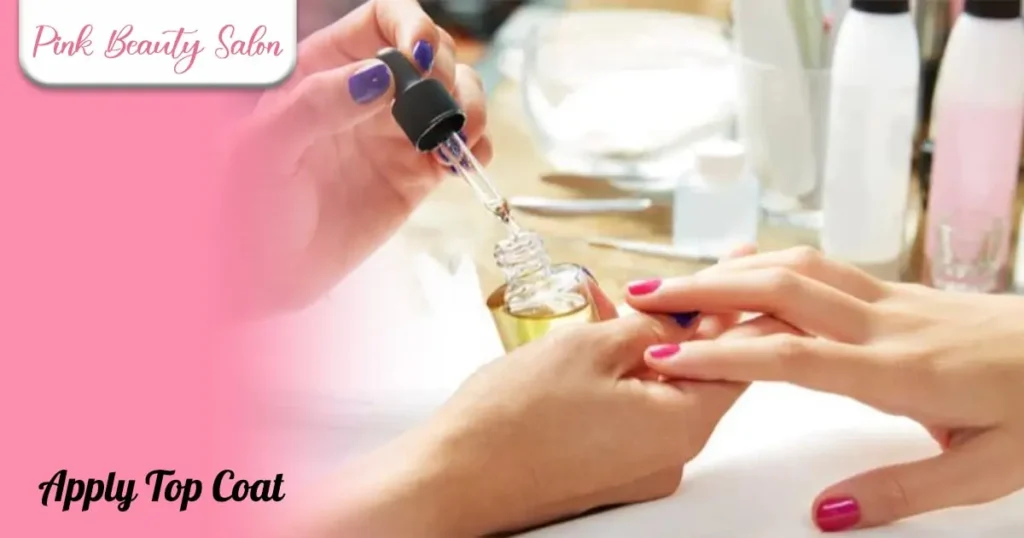
After this, you need to apply a top coat. A top coat is important because it gives your nails a salon-like finish and adds a beautiful shine. Top coats help protect the nail polish color and prevent wear and tear, keeping your manicure intact for a longer time.
Moreover, it’s always best to use the same brand of base coat and top coat, as this ensures better compatibility and helps your manicure or pedicure last even longer.
According to nail magazine, mixing different brands of base coat, polish, and top coat can sometimes cause a loss of adhesion leading to chipping, as well as other problems.
Step 7: Clean The Excess Polish
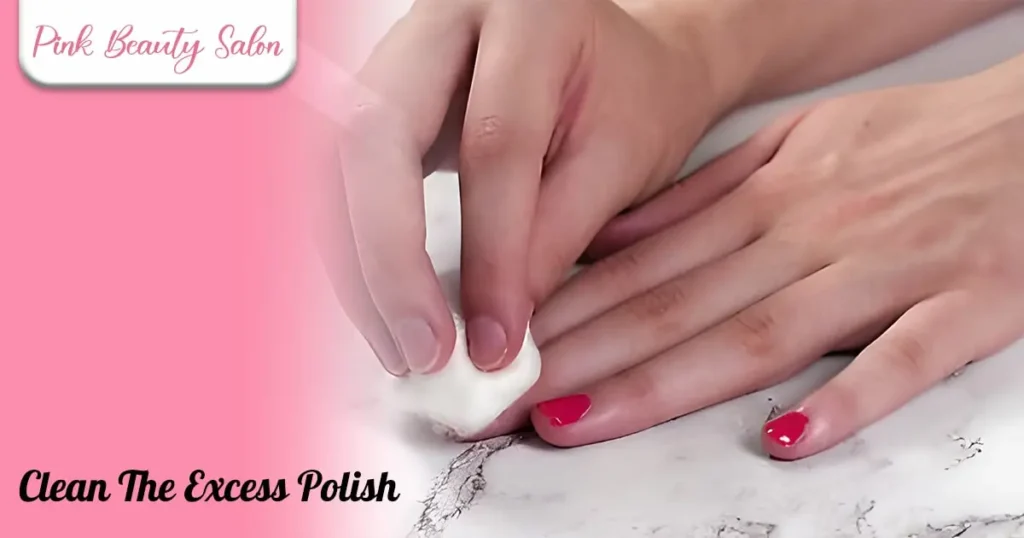
Now that you’ve completed all the essential steps of a manicure and pedicure at home, make sure your nails are clean.
Carefully clean the corners of your nails to remove any extra polish that may have spread outside the nail area. Use a remover or cotton swab to wipe off any excess polish—this will give your nails a neat and finished look.
To complete the process, moisturize your nails and hands using cuticle oil or any nourishing oil of your choice.
Pro Tips for Long-Lasting Manicure & Pedicure at Home
Want your at-home manicure and pedicure to look fresh for days? Here are some pro tips to make your results last longer and look salon-worthy:
1. Never Skip the Base Coat
Always start with a base coat—it’s a game-changer! It helps your polish stick better, prevents staining, and adds a protective layer to your nails. This one small step can seriously boost how long your manicure lasts.
2. Apply Thin Layers Only
Thick coats = chips and bubbles. Instead, apply 2–3 thin layers of polish. They dry faster, give an even finish, and reduce the chances of peeling or smudging. Trust the process—thin is in!
3. Don’t Forget to Seal the Tips
When painting your nails, swipe a little polish over the tips too. This trick seals the edges, which are usually the first to chip. It makes a huge difference in keeping your manicure looking fresh.
4. Nighttime Cuticle Oil = Nail Care Magic
Make it a habit to apply cuticle oil at night. It keeps your nails and cuticles hydrated, prevents hangnails, and adds a healthy shine. A few drops and a quick massage go a long way!
5. Let Nails Dry Properly After Soaking
Soaking your hands or feet before polishing is great for softening skin and cuticles—but don’t rush to paint. When nails absorb water, they expand. If you polish them while still damp, the polish can chip quickly once they shrink back.
Wait at least 30 minutes after soaking to ensure your nails are fully dry before applying polish.
6. Start With the Big Toe (For Pedicures)
When doing a pedicure, always start painting from the big toe. It has the largest surface area and needs more drying time. Starting here allows it to dry while you finish the other toes, reducing the risk of smudging as you apply your second coat or top coat.
Follow these simple yet effective tips, and you’ll notice your at-home manicure and pedicure not only look better but last longer too!
How to Use Manicure Kit Tools
Using a manicure kit is a simple way to care for your nails at home or on the go. Each tool in the kit serves a specific purpose—from trimming and shaping nails to cleaning and caring for cuticles.
Whether you’re doing a quick clean-up or a full manicure, knowing how to use manicure kit tools helps you achieve neat, healthy nails with ease. A well-organized manicure kit makes the process more efficient, hygienic, and professional-looking.
Conclusion
Doing a manicure and pedicure at home isn’t just about grooming—it’s a self-care ritual that helps you relax and feel good. With the right steps, tools, and a little time, you can give your hands and feet the attention they deserve.
From shaping and buffing to soaking, exfoliating, and polishing, every step adds to the final glow. Plus, using proper techniques and following pro tips can help your results last longer and look more professional.
So go ahead, pamper yourself—you’ve earned it! And if you ever feel like enjoying the same experience without lifting a finger, Pink Beauty Salon in Dubai also offers home service manicure and pedicure treatments to bring the salon to you.