Published on: 21 August 2025
Thinking about doing your own Brazilian wax at home? It might sound overwhelming at first, but if you break it down into clear steps, it becomes much more manageable. To give you a roadmap before we dive into the details, here’s the process in order:
- Prep your skin – cleanse, exfoliate, and make sure the area is dry and oil-free.
- Choose your wax – decide between hard wax or sugar wax.
- Position yourself – use comfortable, stable positions (butterfly, one leg up, side-lying, etc.) for visibility and control.
- Apply the wax – work in small strips, following the correct direction for hard or sugar wax.
- Remove the wax – hold the skin taut and pull quickly (against growth for hard wax, with growth for sugar).
- Repeat in sections – continue until all unwanted hair is gone, taking breaks if needed.
- Clean any residue – use water for sugar wax or oil for leftover hard wax bits.
- Soothe the skin – apply a calming, fragrance-free moisturizer to restore your skin barrier.
By following these steps one at a time, you’ll stay in control and make the whole process less stressful—and a lot more effective.
1. Wash and Dry Your Skin
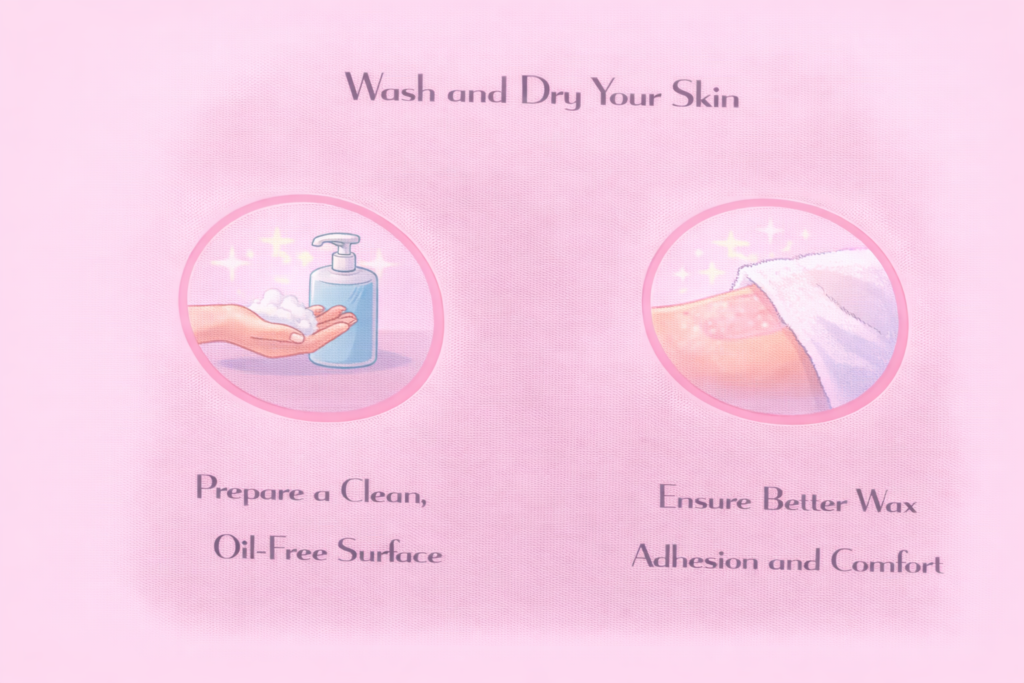
If you’re about to get Brazilian wax, the very first step is cleansing the area properly. Why? Because it lowers the risk of infection and makes the whole process way more effective. When the skin is moist, the wax just doesn’t grip the hair the way it should. That usually means incomplete hair removal—or worse, extra tugging that you definitely don’t want.
So here’s what you should do: wash the area to make sure it’s clean. But skip the hot water or steam, since those can soften your skin and make it more sensitive during waxing. After washing, gently pat your skin completely dry with a clean towel.
Make sure you’re using a gentle, fragrance-free cleanser. This helps clear away sweat, natural oils, dead skin cells, and any leftover skincare products that could interfere with the wax sticking properly.
One more thing—don’t apply any creams, lotions, or oils before waxing unless the product you’re using specifically tells you to. According to the American Academy of Dermatology, waxing works best on skin that’s totally dry, free of oil, and water-free. That’s when the wax really adheres to the hair for the cleanest results.
2. Apply Powder

Before starting your Brazilian wax, applying powder might feel like a small step—but it actually makes a big difference. The powder acts as a barrier between your skin and the wax, so instead of sticking to moisture or skin, the wax grips the hair more effectively. That means smoother removal, less discomfort, and a lower chance of irritation.
Most people reach for baby powder, which is usually made from talc or cornstarch. Its job is simple but important: keeping your skin dry, especially if you’re prone to sweating or live in a humid environment. Research shows that powders like baby powder or cornstarch absorb excess oils and moisture, helping the wax stick better so hair comes off more cleanly.
That said, while baby powder is convenient and budget-friendly, it’s not always as effective as pre-wax powders made specifically for hair removal. Professional-grade options often come with extra ingredients—like zinc oxide or vitamin E—that give your skin added protection and help the wax perform even better.
One thing to keep in mind: even though baby powder is designed to be gentle, some people still get irritation or sensitivity, especially from scented versions. To stay safe, always go for an unscented powder and test it on a small patch of skin before moving on to a full wax.
When you use powder the right way, it can really enhance the entire waxing process—less friction, a better grip, and an overall cleaner, more comfortable experience.
3. Choose The Wax Type
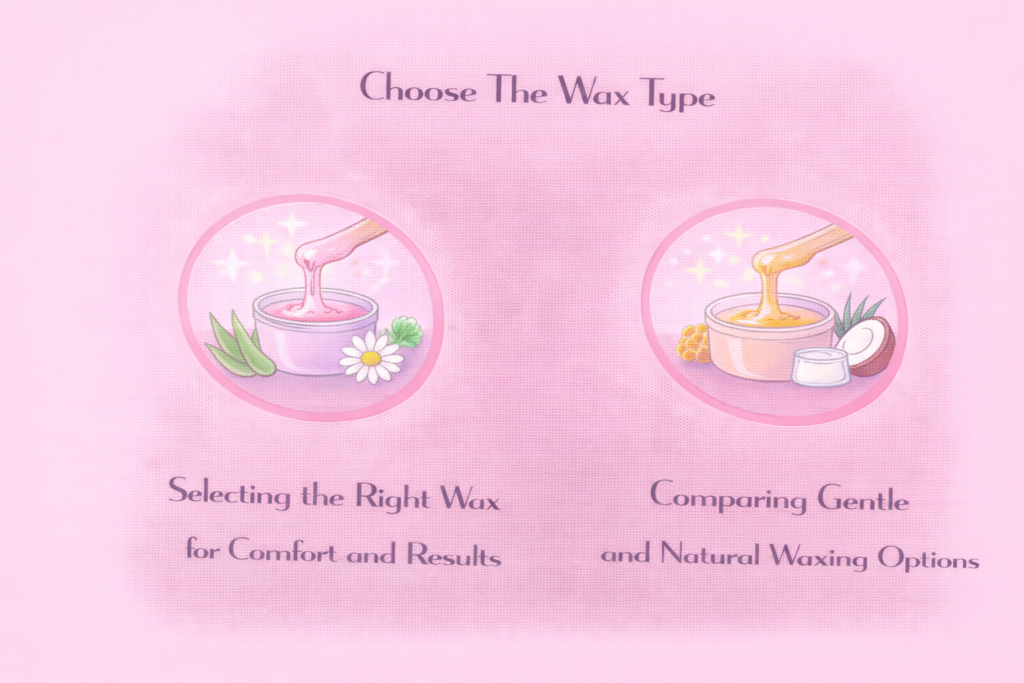
When it comes to giving yourself an at-home Brazilian wax, one of the biggest decisions you’ll make is choosing the right wax. The type you pick sets the tone for how smooth, comfortable, and effective your results will be.
Two of the best options? Hard wax and sugar wax. Both work wonderfully, but each has its own strengths depending on your skin type, hair texture, and comfort level.
Choosing The Hard Wax
Hard wax is a favorite for a reason. It’s usually made from beeswax, resin, and nourishing oils, and you apply it warm directly onto the skin. No cloth strips needed—once it cools and hardens, you simply peel it off, and it takes the hair right from the follicle.
Here’s the best part: hard wax sticks more to the hair than the skin. That means less pulling, less irritation, and a much gentler experience in sensitive areas. Board-certified dermatologist Dr. Hadley King points out that this makes hard wax less painful and less irritating, which is why estheticians often recommend it for delicate or easily reactive skin.
If your hair is coarse or stubborn, hard wax is also a winner. It fully encapsulates each strand, giving you precise results and often clearing the area in just one pass. Plus, by reducing trauma and friction on your skin, it helps lower the chances of post-wax redness and ingrown hairs—something everyone wants to avoid.
Choosing The Sugar Wax
Now let’s talk about sugar wax, or sugaring. This method is as natural and eco-friendly as it gets—it’s made from just sugar, lemon juice, and water. That makes it a chemical-free option that’s perfect if you have sensitive or allergy-prone skin.
The technique is a little different: the paste is applied against the direction of hair growth and then removed in the natural direction. This small difference makes a big impact—it reduces hair breakage, protects the follicle, and cuts down on irritation and ingrown hairs. Dermatologists agree that sugaring’s “with the grain” approach helps protect the skin and keep inflammation at bay.
Another big advantage? Sugar wax can grab even very short hairs (as little as 1/16 of an inch), so you don’t have to wait as long between treatments. And because it’s water-soluble, cleanup is quick and easy—just rinse with water and you’re done. If you’re after a clean, sustainable, low-irritation option, sugaring is hard to beat.
At the end of the day, the best wax for your Brazilian comes down to your skin, your hair, and your preferences. If you’ve got coarse hair or want a gentler pull in sensitive areas, hard wax might be your go-to. But if you’re looking for a natural, skin-friendly, and eco-conscious method, sugar wax could be the perfect match.
4. Prepare The Wax
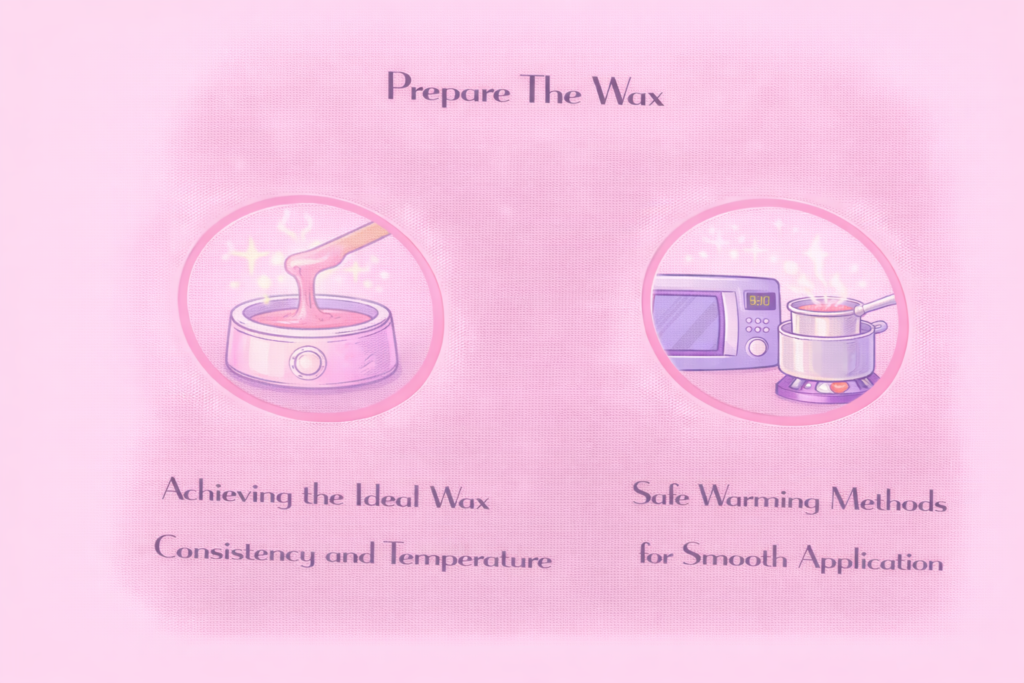
Preparing Hard Wax
If you’re using hard wax, getting the temperature right is everything. You’ll want to heat it in a wax warmer (much safer than a microwave) until it reaches a smooth, honey-like consistency. The sweet spot is around 130 °F (54–65 °C)—perfect for melting and easy application.
Don’t forget to keep stirring while it warms up. This makes sure the heat spreads evenly and prevents hot spots that could either burn you or make the wax too inconsistent to work properly. Before you apply it anywhere sensitive, like your bikini line, always test the temperature on the inside of your wrist.
Here’s an important safety note: studies show that microwave-heated wax can reach dangerously high temperatures and cause burns, so avoid relying on that method. Stovetop heating is also risky—it can easily overheat the wax and damage its ability to grip hair. Stick with a warmer, stay safe and prepare for Brazilian wax thoroughly.
Preparing Sugar Wax
Sugar wax is a little easier and more forgiving to prepare. If you’ve bought a sugaring paste, check the label first—most of them only need a quick warm-up to reach the right consistency. What you’re aiming for is something firm but stretchable, kind of like taffy.
To warm it, you can place the sealed container in a bowl of warm water for a few minutes. Or, if you’re using a microwave, heat it in short bursts of 5–10 seconds, stirring and testing as you go.
Making your own sugar wax at home? All you need is sugar, lemon juice, and water. Heat the mixture gently on the stovetop until it thickens and takes on a slightly darker color. Let it cool down before using—it should be applied at room temperature or just slightly warm.
One of the perks of sugar wax is that it’s water-soluble, so cleanup is a breeze. And because it’s much less likely to cause burns, it’s often recommended for beginners. Its mildness and control during application make sugaring a great way to ease Brazilian waxing at home.
5. Apply The Wax
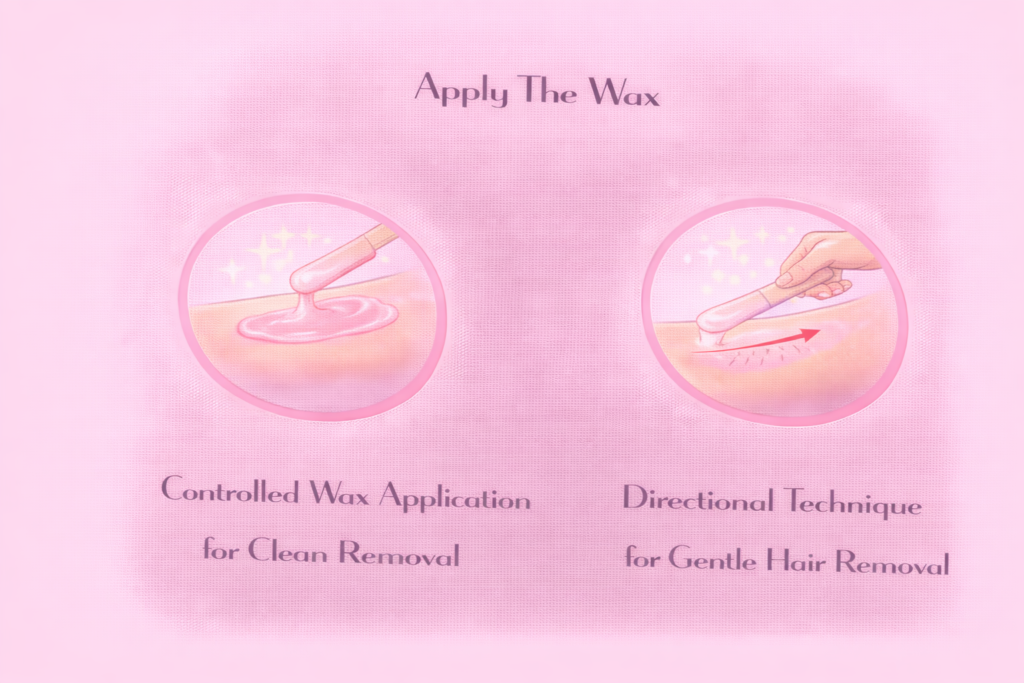
Applying Hard Wax
When it’s time to apply hard wax, grab a wooden spatula or applicator stick and spread a thick, even layer of wax in the direction your hair grows. Don’t go too thin, and definitely don’t apply it too hot—experts warn that both mistakes can lead to broken hairs, burns, or just disappointing results.
Here’s the trick: wax works best when it’s applied at the right thickness and your skin is stretched firmly. This combo helps reduce pain and protects your skin from unnecessary trauma. If you’re new to waxing, or working on sensitive spots like the bikini line or labia, always start small.
When you spread the wax, make the edges a little thicker—that way, you’ll have something to grip when it’s time to remove it. Let it sit for about 20 to 30 seconds until it hardens. You can check by gently tapping the edge with your fingernail—it should feel firm but still a little flexible.
Now comes the big moment: with one hand, hold your skin taut. With the other, lift the edge of the wax and pull it off quickly, in the opposite direction of hair growth, in one smooth motion. That’s how you’ll get the cleanest results with the least discomfort.
Applying Sugar Wax
With sugar wax, the technique looks a little different but is just as straightforward. Pinch off a small amount of the paste and roll it into a ball between your fingers. Press it onto your skin and spread it against the direction of hair growth, pressing and flattening it slightly as you go.
To remove it, use a quick flicking motion in the same direction your hair grows. This makes a big difference—it helps prevent breakage and significantly reduces the risk of ingrown hairs. One bonus? You can actually reuse the same ball of sugar wax a few times until it loses its stickiness, which makes it a surprisingly economical option.
Another perk is how gentle it is. Sugar paste doesn’t cling to live skin cells—it only attaches to hair and dead skin. That means less irritation overall. Dermatologist Dr. Rachel Nazarian points out that this method is especially helpful if you have sensitive skin or have dealt with follicular irritation before, since it minimizes trauma to the follicle and lowers the chance of inflammation.
6. Remove The Wax
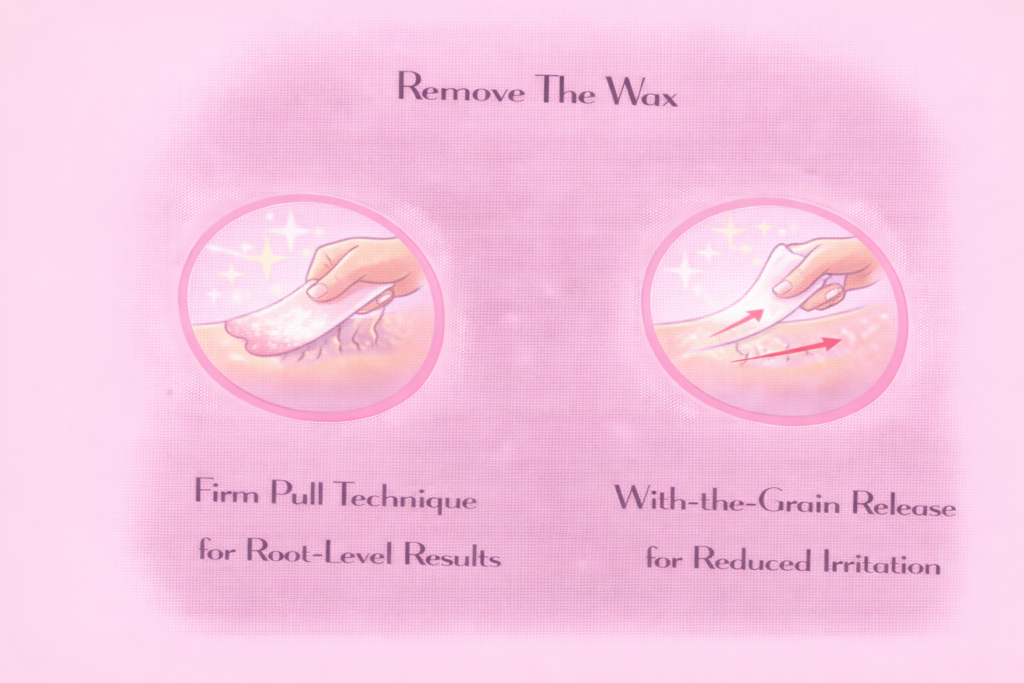
Removing Hard Wax
Once your hard wax has cooled and hardened, it’s time to take it off. Start by holding your skin tight with one hand—this step is crucial to prevent tugging or bruising. With your other hand, lift the edge of the wax and pull it off quickly and firmly, against the direction of hair growth, in one smooth motion.
That quick, confident pull is what gets the hair out from the root and keeps breakage to a minimum. Whatever you do, don’t hesitate or pull slowly—that only makes it more painful and can leave hairs behind. Hard wax gives you the cleanest results when you remove it swiftly in the opposite direction of growth.
If it’s your first time, work in small sections so you have more control. And here’s a pro tip: immediately press your hand on the area right after you pull. That simple step helps soothe the sting and calm your skin.
Removing Sugar Wax
Sugar wax has its own technique. After you’ve spread the paste against the direction of hair growth, you’ll remove it by flicking or pulling it off in the same direction as hair growth. This little difference is a big deal—it reduces trauma at the follicle and helps prevent irritation and ingrown hairs.
Keep your skin taut, then use a quick, controlled flick with your fingers to remove the paste. Sometimes you might need to flick 2–3 times to clear one strip, especially if the wax has cooled a bit or the hair is thick.
Because you’re removing the hair with the grain, sugaring is much gentler on your skin. That’s why it usually causes less inflammation and fewer ingrowns—making it a great option if your skin is on the sensitive side. And the best part? Sugar wax is water-soluble, so any sticky residue left behind rinses right off with warm water.
7. Work in Small Sections
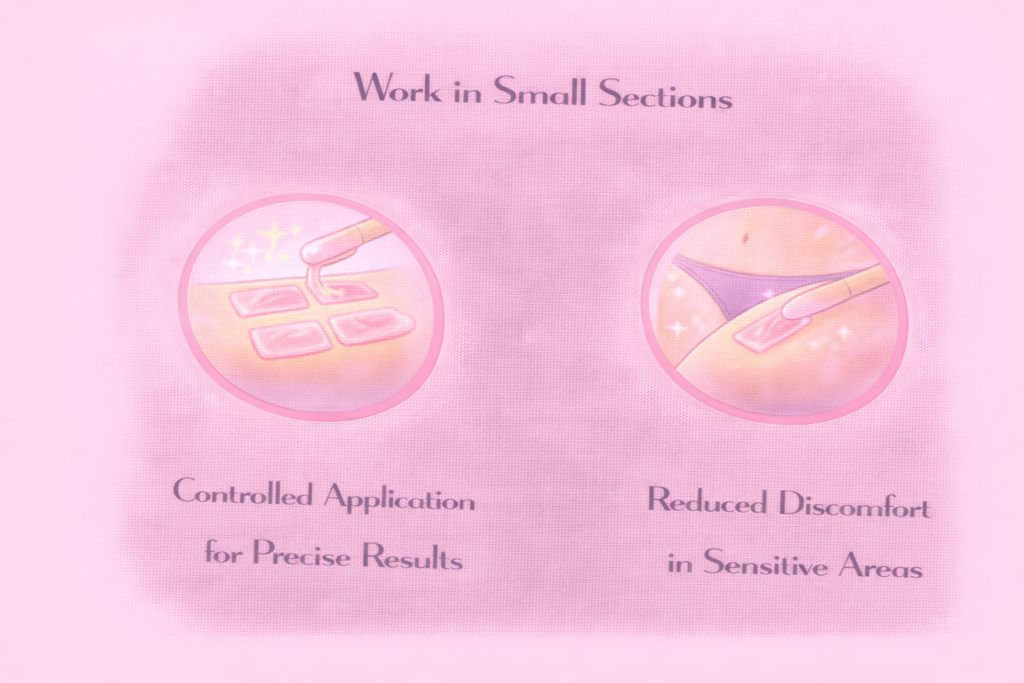
No matter if you’re using hard wax or sugar wax, here’s one golden rule you shouldn’t skip: always work in small sections. It’s the key to getting clean results and keeping the pain manageable—especially in delicate spots like the bikini line, labia, or perianal area.
Sure, applying wax over a large area might sound quicker, but it almost always backfires. Bigger strips mean more discomfort, a higher chance of skin lifting or bruising, and results that can look patchy or uneven. Smaller sections, on the other hand, give you way more control. You can stretch the skin properly, apply steady pressure, and remove the wax with confidence.
The sweet spot for Brazilian waxing is about 1 to 2 inches wide per strip. This size helps the wax stick evenly and gives you a firm edge to grip when it’s time to pull.
Another benefit? Working in smaller sections lets you keep a close eye on how your skin is reacting. That’s especially important if your skin is sensitive or tends to get irritated—you’ll be able to adjust your technique before things get uncomfortable.
8. Repeat The Process Until All Hairs Are Removed
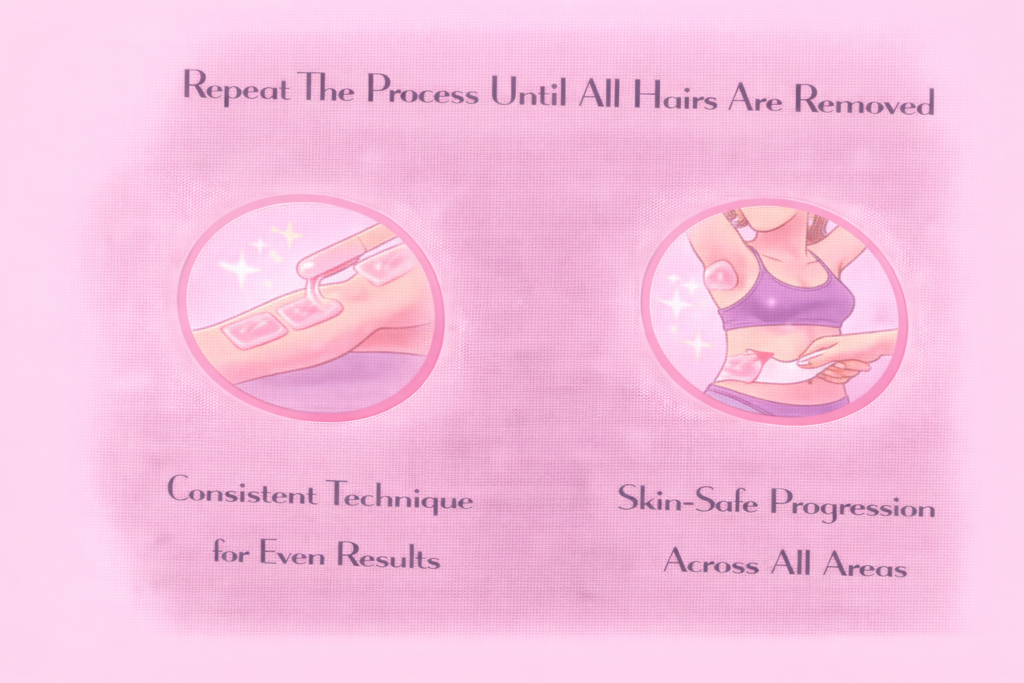
Once you’ve finished one section, just keep repeating the process in small, controlled areas until all the unwanted hair is gone. The key here is consistency—apply the wax the same way each time, keep your skin stretched taut, and pull in the correct direction.
Sticking to the same technique across every section ensures even results and helps cut down on irritation.
With hard wax, you’ll usually need to apply a fresh layer for every new section. Sugar wax, on the other hand, is a little more forgiving—you can often reuse the same ball until it loses its stickiness.
Dermatologists recommend taking breaks if your skin starts to feel overly sensitive or if you notice redness setting in. Don’t rush, and definitely avoid overlapping strips. That’s where mistakes happen—things like damaged skin, bruising, burns, or ingrown hairs. Giving your skin a chance to rest between strips makes the whole process more comfortable and less inflamed.
Work section by section until you’ve covered all the target areas, including the labia, mons pubis, and rectal region. A handheld mirror is super helpful for reaching tricky spots safely. And one last rule—never re-wax the same patch more than once in a single session. Your skin will thank you for it.
9. Clean Your Skin
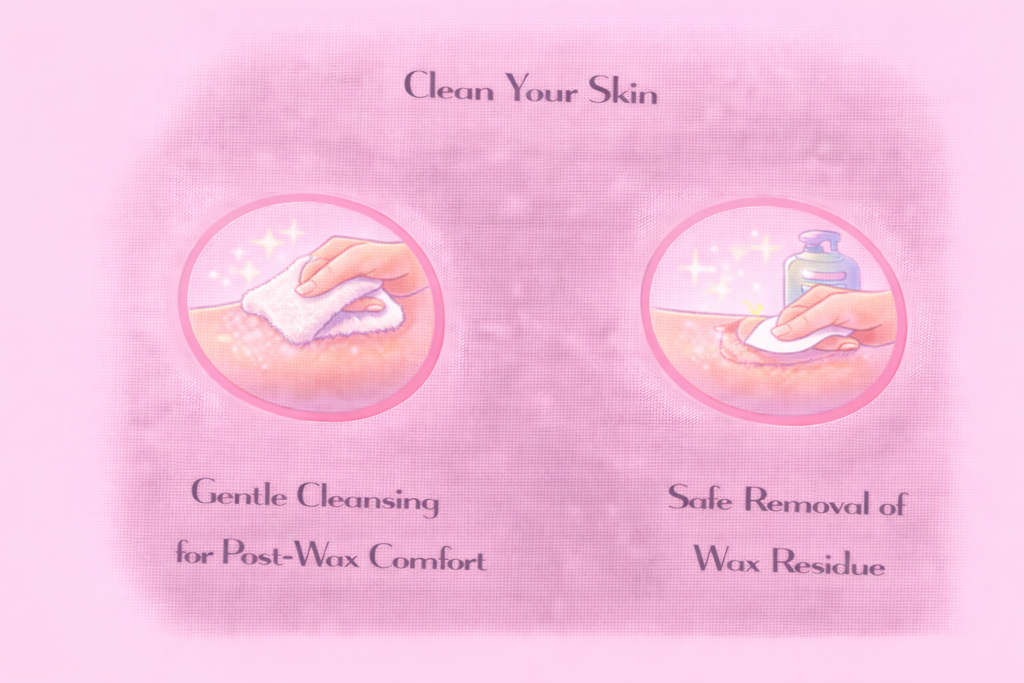
Once you’ve finished removing all the wax and hair, your very first step is to cleanse the area gently. This helps clear away any residue or skin debris so your skin can start calming down right away. Use a clean, damp cloth or rinse with cool to lukewarm water.
If you used sugar wax, this part is even easier since it’s water-soluble and rinses off quickly. Just remember—skip hot water and don’t scrub. Both can make freshly waxed skin more irritated.
If you’ve been using hard wax, you might notice a few tiny fragments left behind. It’s tempting to just pick them off with your fingers, but try not to—doing so can scratch or irritate sensitive skin. Instead, reach for a specialized post-wax oil.
It gently dissolves any leftover bits without causing trauma to the skin, leaving everything clean and smooth.
10. Use Baby Oil
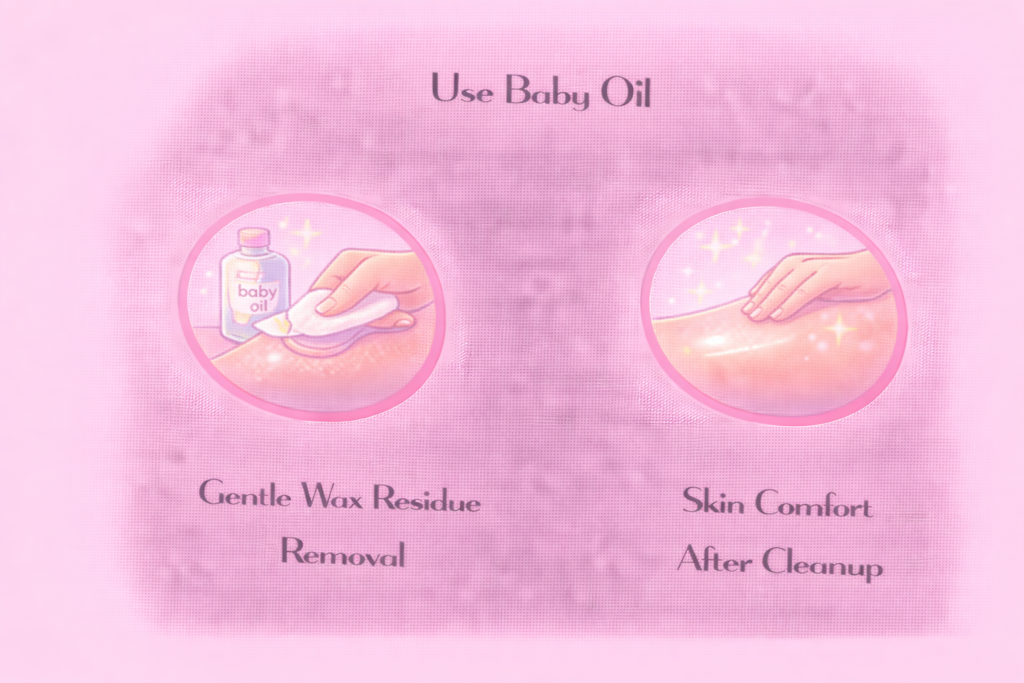
After waxing—especially if you’ve used hard wax—it’s totally normal to find a few stubborn bits of wax still clinging to your skin. Don’t scrape or try to pull them off; that’ll only irritate the area. Instead, put a few drops of baby oil on a cotton pad and gently sweep it over the skin.
The oil works like magic—it dissolves the leftover wax without any rubbing or friction, so cleanup feels effortless. This step is especially helpful in spots where hard wax tends to set unevenly or grab onto fine hairs. Once the residue is gone, make sure to blot away any excess oil before you move on to applying your moisturizer.
11. Apply Moisturizer
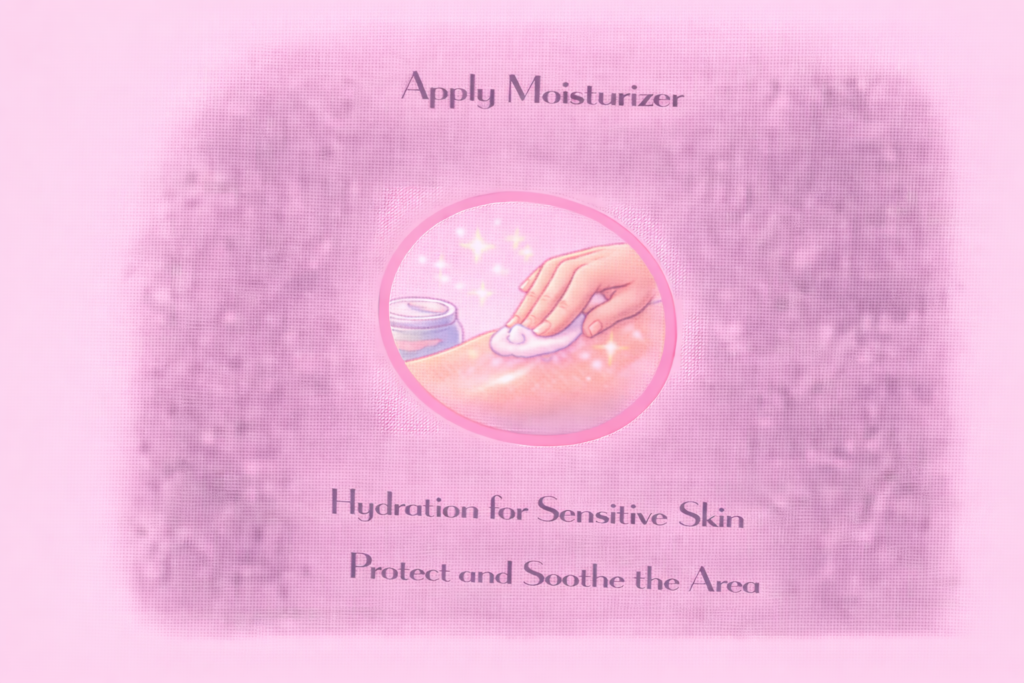
Waxing does more than just remove hair—it also temporarily disrupts your skin barrier. That’s why one of the most important steps afterward is applying a soothing, fragrance-free moisturizer.
Look for creams or gels that include calming, skin-repairing ingredients like aloe vera, panthenol, ceramides, niacinamide, or Centella asiatica. These help bring down inflammation, ease redness, and speed up your skin’s recovery. Dermatologist Dr. Brendan Camp especially recommends moisturizers rich in ceramides, since they restore hydration and reduce the risk of post-wax irritation or flaking.
What you want to avoid are lotions with alcohol, artificial fragrance, or essential oils—these can sting or trigger sensitivity on freshly waxed skin.
For best results, apply your moisturizer within 10–15 minutes after waxing, then keep reapplying it twice a day for the next 48 hours. This simple routine keeps your skin soothed, supported, and silky smooth.
How Do You Position Yourself For Brazilian Wax?
If you’re doing Brazilian wax at home, positioning is everything. You’ll need setups that give you clear visibility, easy access, and stability—especially when you’re working on tricky spots like the labia or perianal area. Most pros recommend picking a well-lit, clean space with a mirror nearby so you can actually see what you’re doing.
Here are some tried-and-true positions you can use:
1. Butterfly Position
Lie on your back with your knees bent and your feet flat on the bed or floor. Let your knees drop outward until the soles of your feet touch each other. This “butterfly” shape opens up the bikini zone, giving you a clear view and easy reach. It’s perfect for most of the front and center work—and it’s usually the easiest position for beginners.
2. One Leg Up
Stand or sit beside a sturdy surface, like the edge of a bathtub, chair, or low stool. Place one foot on the surface while keeping the other firmly on the ground. This position is great for working on the sides or outer areas. It gives you excellent angle control and leaves one hand free to stretch the skin while the other applies wax.
3. Side-Lying (Fetal) Position
Lie down on your side and pull your top knee up toward your chest. If needed, use one hand to gently lift your upper buttock. This position makes it much easier to reach the back or perianal region. It’s also more stable than squatting and works really well if you place a mirror on the floor.
4. All Fours (Tabletop) Position
Get onto your hands and knees with your back flat and your hips slightly raised. Placing a mirror underneath you helps a lot with visibility. This position naturally separates the buttocks, giving you clear access to the hardest-to-reach areas—without twisting yourself into uncomfortable angles.
5. Squatting Over a Mirror
Stand with your feet a little wider than shoulder-width apart and squat low over a handheld or floor mirror. Keep your balance and hold the skin taut as you go. This position gives you a direct, full view of your intimate area. It might feel a little awkward at first, but many experienced DIYers swear by it for precision work.
Can I Give Myself Brazilian Wax?
Technically, yes—you can give yourself a Brazilian wax. But here’s the truth: it’s not easy and definitely not the best starting point if you’re new to waxing. The area is sensitive, tricky to reach, and requires a lot of precision. You’ll need good flexibility, the right tools, and solid technique.
The risks are real—overheated wax, not holding the skin taut, or pulling at the wrong angle can lead to burns, tears, or even infection. If you still decide to try it yourself, stick to hard wax or sugar wax, work in small sections, and always use a mirror for visibility. And of course—keep everything clean and follow proper aftercare.
That said, for most people, booking with a licensed esthetician is the safer, faster, and less painful way to go.
Which Home Salon Offers the Home Waxing in Dubai
Pink Beauty Salon offers professional home waxing in Dubai designed for comfort and convenience. Our expert team provides everything from Brazilian and bikini waxing to full arms, legs, and other body areas, ensuring smooth, flawless results without leaving your home.
Using high-quality products and hygienic techniques, we deliver salon-level care in a private setting, making it easy to maintain silky, hair-free skin with trusted service at your doorstep.
Conclusion
Brazilian waxing at home can be done, but it requires patience, the right technique, and extra care. Whether you choose hard wax or sugar wax, the key is working in small sections, holding the skin taut, and following proper aftercare to keep your skin healthy and irritation-free.
Remember, it’s completely okay to leave tricky areas to a professional if you’re unsure. At the end of the day, your comfort and safety matter most—smooth results should never come at the expense of your skin’s health.